Picture this: You walk into your craft room, and instead of digging through drawers for scissors, everything you need is right there at eye level. Your kitchen utensils aren’t buried in overcrowded drawers, and your garage tools? They’re actually where you left them. Sounds too good to be true?
Here’s the thing – I used to be that person with the “organized chaos” approach to storage. You know, the one where I knew my stuff was somewhere in that pile. But then I discovered the magic of pegboard organizers, and honestly, it changed everything about how I think about storage.
What Is a Pegboard and How Does It Work?
Let’s start with the basics, shall we? A pegboard is essentially a panel with evenly spaced holes that accept pegs, hooks, and various accessories. Think of it as a Swiss Army knife for storage – one tool, countless possibilities.
The concept isn’t new (pegboards have been organizing workshops since the 1940s), but what is new is how creative we’ve gotten with them. The beauty lies in the flexibility – you can rearrange, add, or remove components whenever your needs change. No more permanent holes in walls or rigid storage systems that don’t grow with you.
Here’s what makes pegboards so brilliant: those uniform holes create a grid system that accepts standardized accessories. Whether you need hooks for hanging tools, shelves for displaying items, or containers for corralling small parts, there’s a pegboard accessory for that.
Popular Pegboard Organizer Ideas for Different Rooms
Now, here’s where it gets exciting. I’ve seen pegboards transform spaces in ways that would make Marie Kondo proud. Let me walk you through some of my favorite room-by-room applications:
Home Office: Your Productivity Command Center
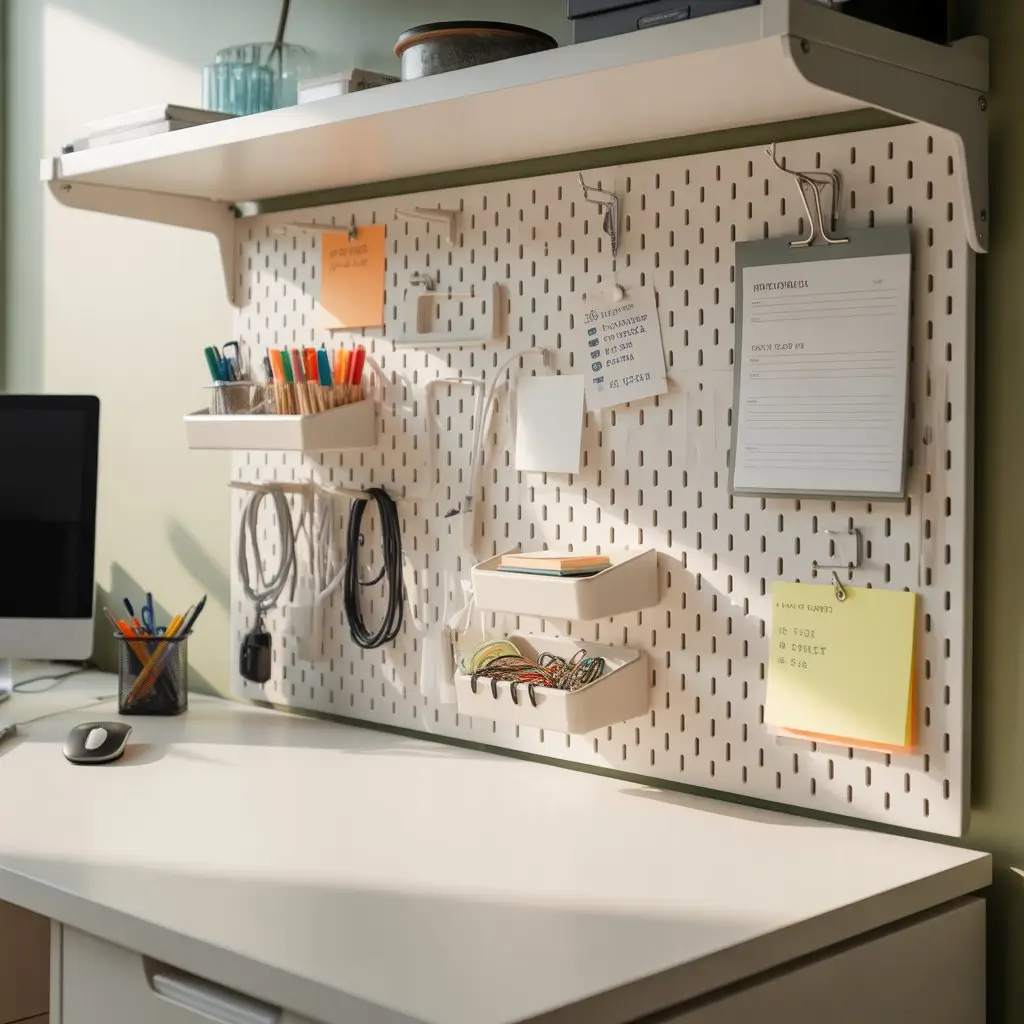
Your home office pegboard can serve for the hub of your productivity. I’m talking about creating dedicated zones: a section for frequently used pens and markers, another for charging cables (finally, a place where they won’t disappear!), and even small containers for paper clips and sticky notes.
What I love most? You can hang your daily planner, pin important reminders, and keep your desk surface completely clear. It’s similar to having a personal assistant who never takes a coffee break.
Kitchen: The Heart of Culinary Efficiency
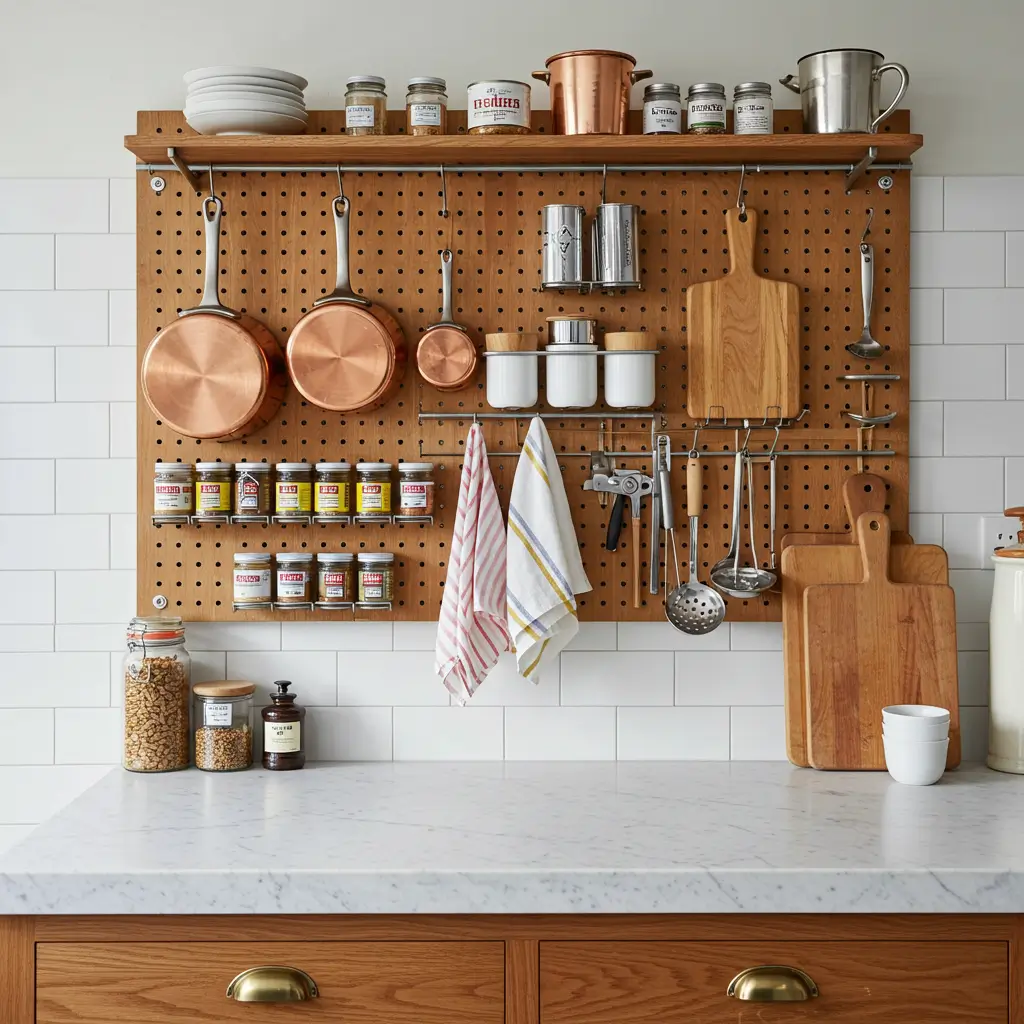
Let’s be honest – rummaging through kitchen drawers is the worst. You know that frustrating moment when you’re looking for the can opener while something’s burning on the stove? A kitchen pegboard eliminates that chaos.
Hang your most-used utensils at eye level, create a spice station with small containers, and use hooks for measuring cups and cutting boards. I’ve even seen people create beautiful displays with copper pots and colorful dish towels. Function meets style that’s what I’m talking about.
Craft Room: Where Creativity Meets Organization
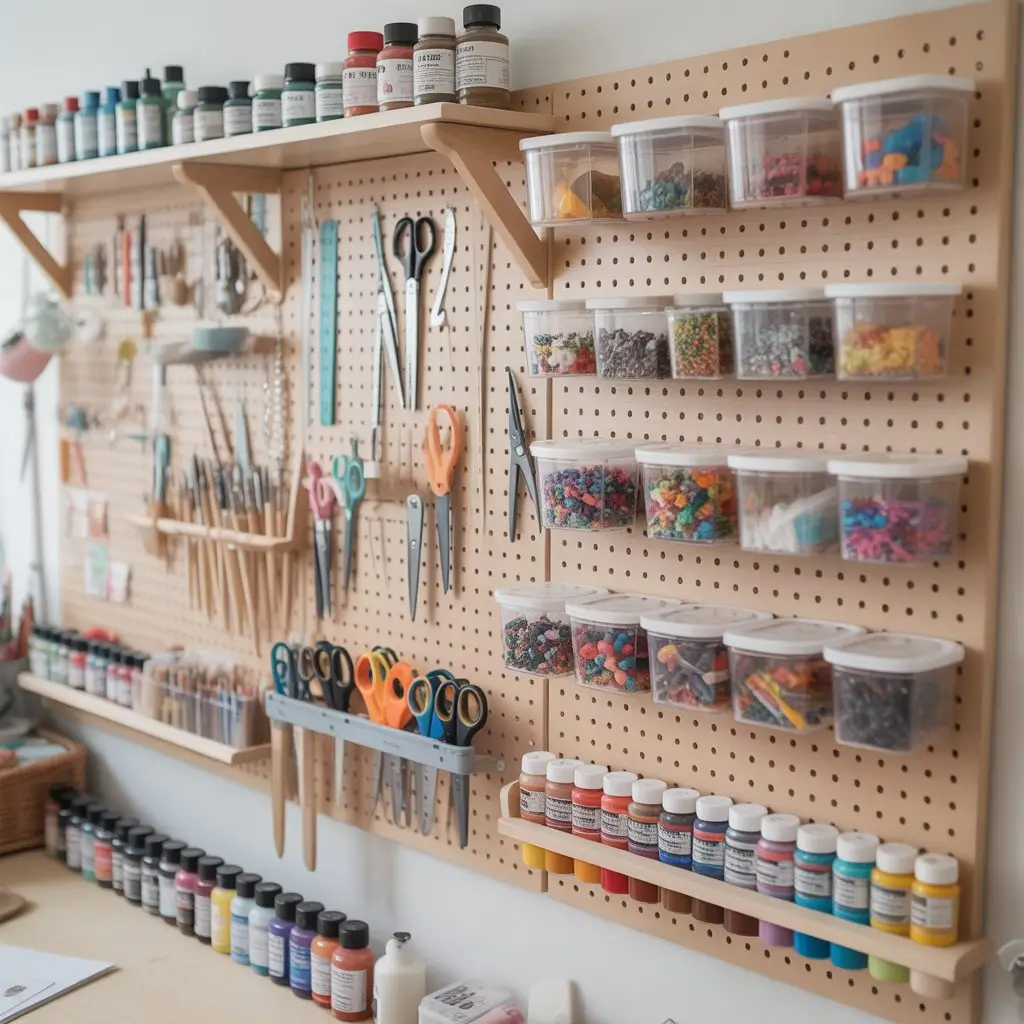
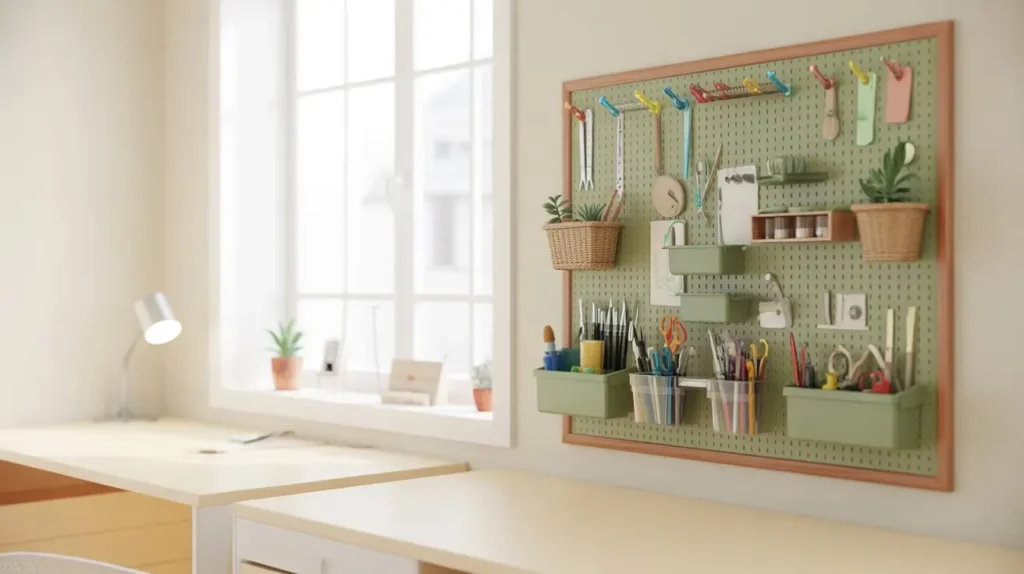
If you’re a crafter, you already know the struggle. Supplies everywhere, half-finished projects competing for space, and that sinking feeling when you buy something you already own (but couldn’t find). A craft room pegboard is like having a visual inventory of all your supplies.
Use clear containers for beads and tiny items, hooks for scissors and rulers, and small shelves for paint bottles. The best part? Everything’s visible, so you’ll actually use those supplies you forgot you had.
Garage and Workshop: Heavy-Duty Organization
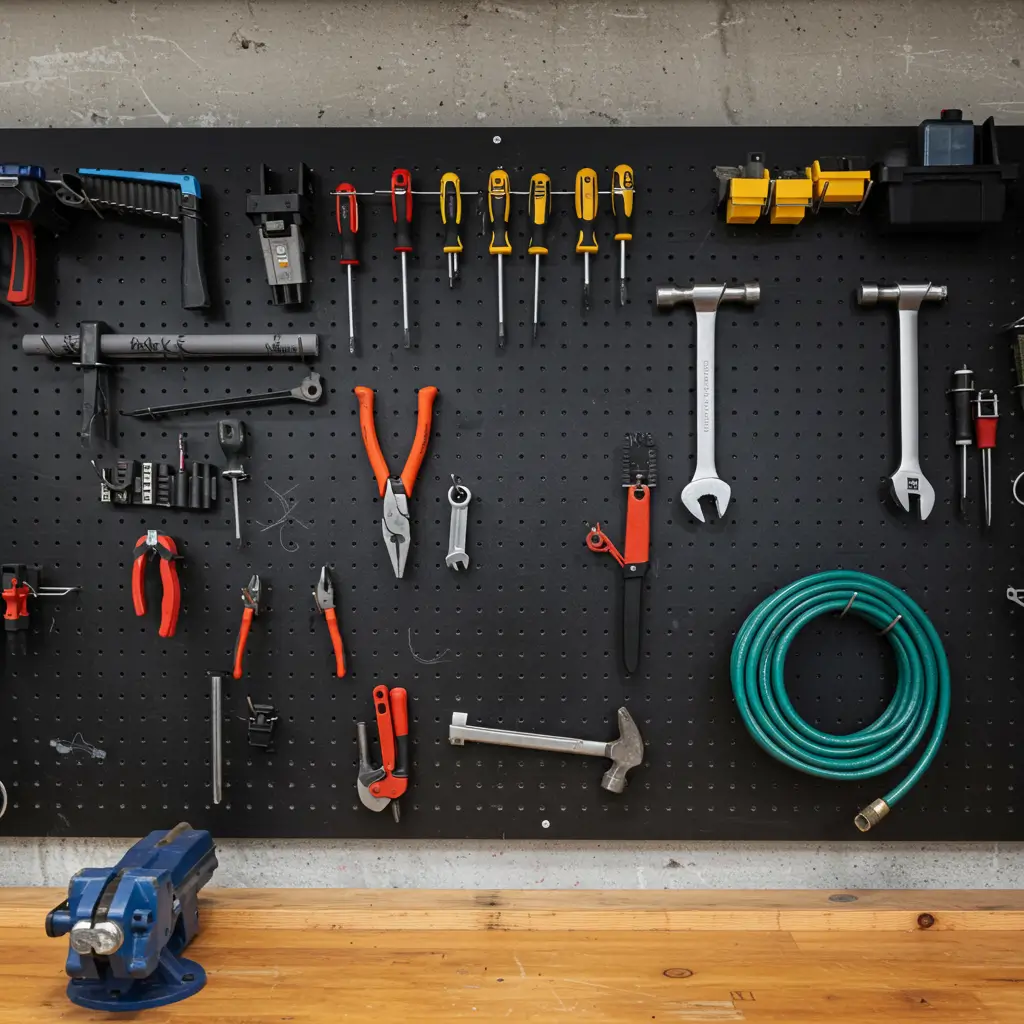
Here’s where pegboards really show their muscle. Garage pegboards can handle everything from screwdrivers to garden hoses (with the right accessories, of course). The key is thinking vertically – why let all that wall space go to waste?
Pro tip: outline your tools with a marker so everyone in the family knows where everything belongs. It’s like visual instructions that actually work.
Kids’ Rooms: Teaching Organization Early
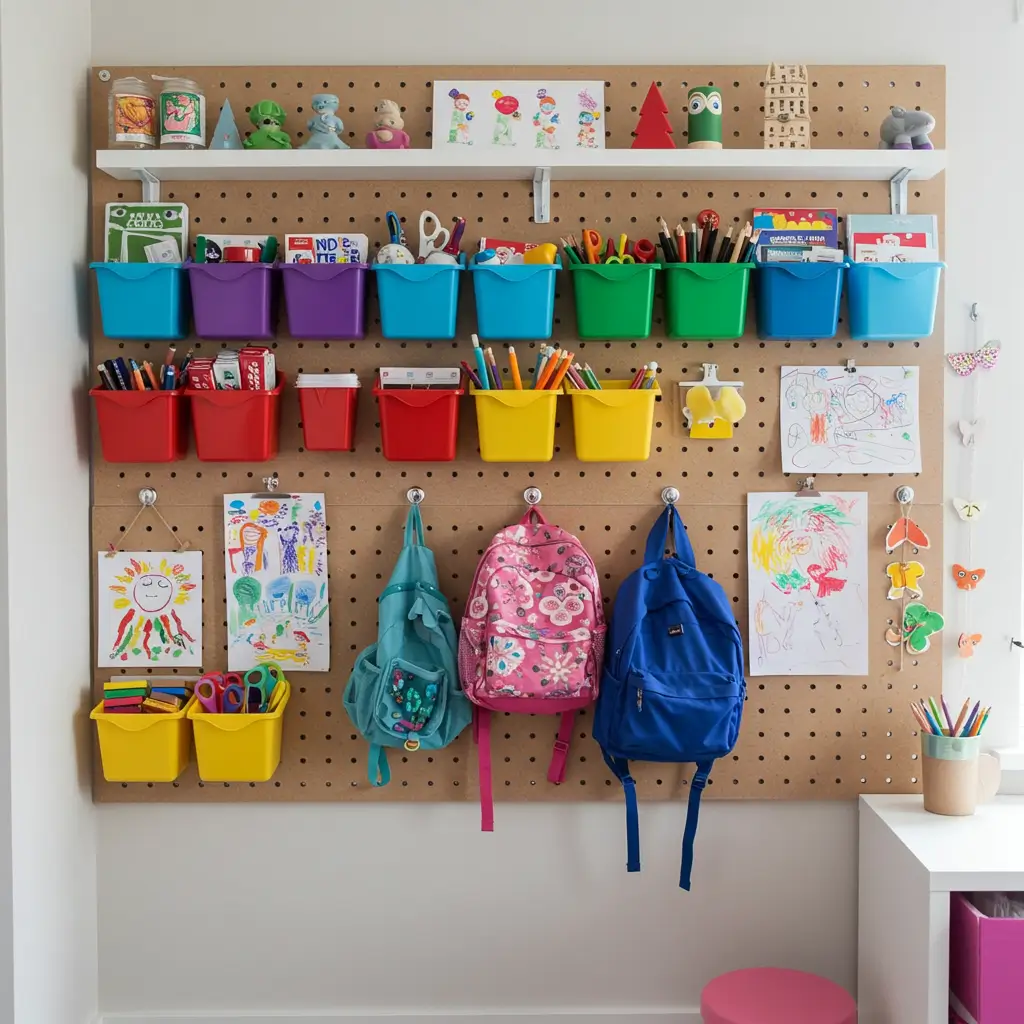
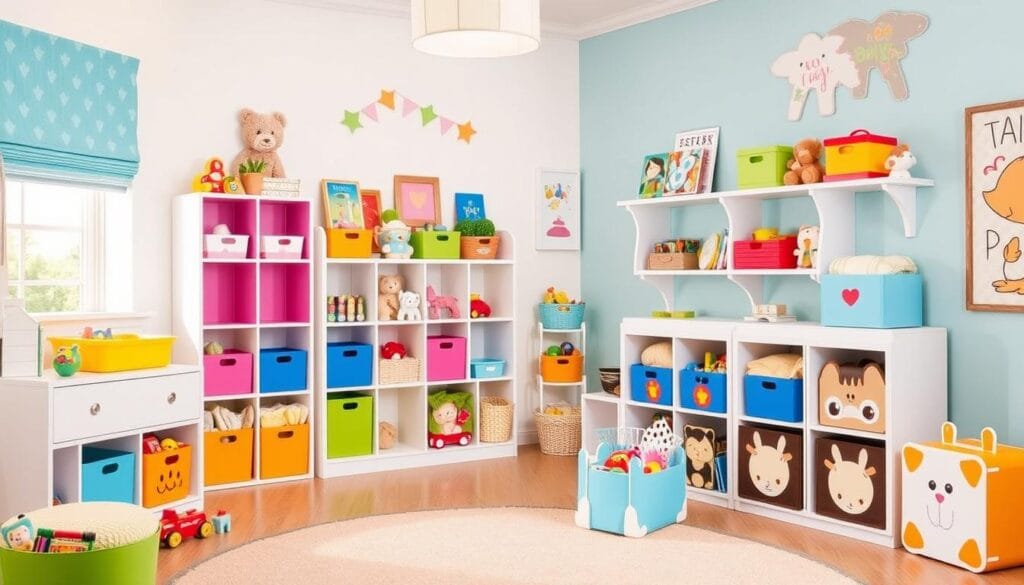
Kids and organization don’t go together, I promise! Pegboards make it easy for children to see where things belong and put them back independently. Use colorful containers for art supplies, hooks for backpacks and jackets, and small shelves for displaying their masterpieces.
The visual nature of pegboards works perfectly with how kids think. When they can see it, they’re more likely to use it (and put it back).
DIY Pegboard Projects for Personalization and Style
Now we’re getting to the fun part – making your pegboard uniquely yours. Because let’s face it, plain brown pegboard isn’t exactly Pinterest-worthy.
Paint It Up
This is where you can let your personality shine. I’ve seen pegboards painted in bold colors that become the focal point of a room, or in subtle neutrals that blend seamlessly with existing decor. The key is choosing a color that complements your space while making your stored items pop.
Here’s a trick I learned: prime your pegboard first, especially if you’re going from dark to light. Trust me on this one – it’ll save you multiple coats and a lot of frustration.
Frame It for Sophistication
Want to make your pegboard look more intentional and less “industrial”? Add a frame around it. This simple trick transforms a utilitarian storage solution into a designed element. You can use simple trim molding or get fancy with decorative frames – whatever matches your style.
Create Functional Art
Who says storage can’t be beautiful? I’ve seen pegboards used as living walls with small planters, photo displays that change with the seasons, and even vision boards that inspire daily goals. The possibilities are literally endless.
Installation Tips and Choosing the Right Pegboard Materials
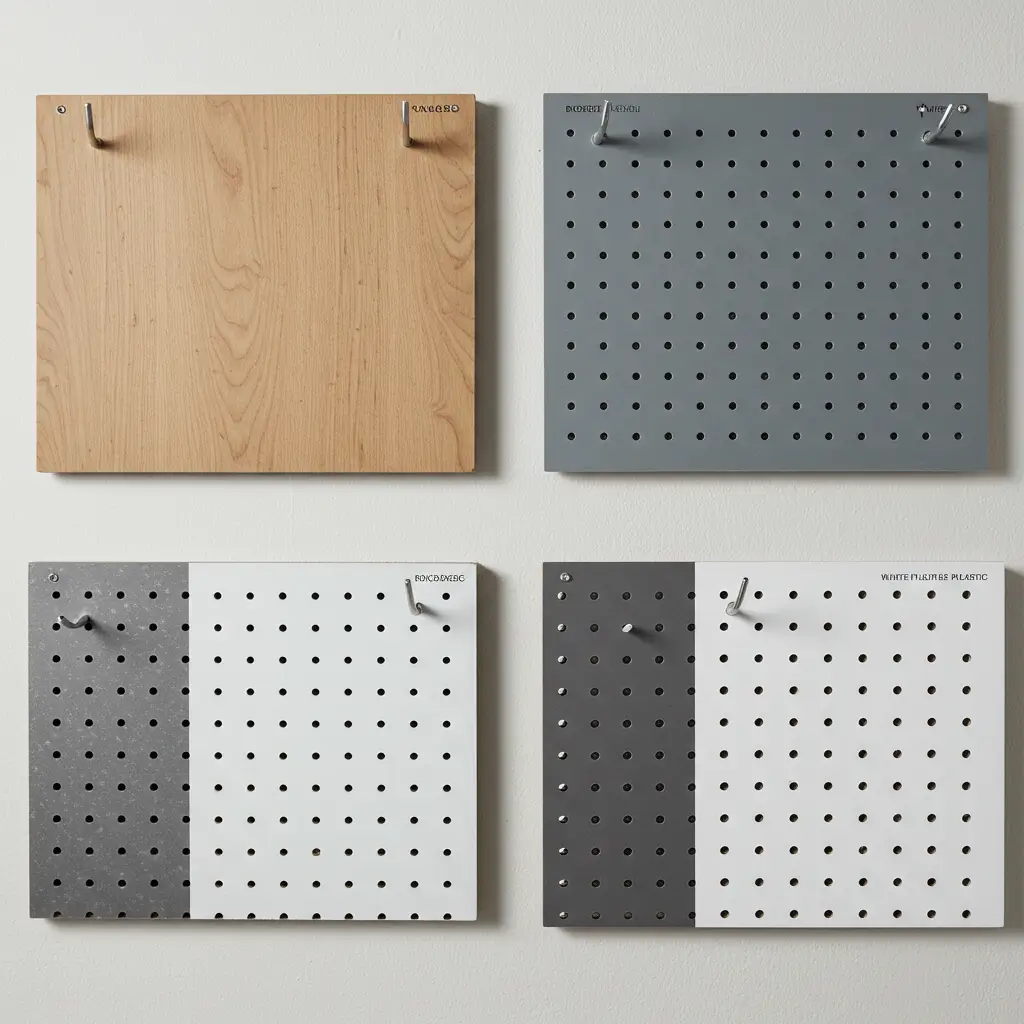
Alright, let’s talk about the nuts and bolts – literally. Choosing the right pegboard material and installing it properly can make or break your organization dreams.
Material Matters
You’ve got options, and each has its place:
Wood pegboards are classic and sturdy, perfect for heavier items and tools. They paint beautifully and have that timeless workshop vibe.
Metal pegboards are incredibly durable and can handle serious weight. They’re ideal for garages and workshops where function trumps form.
MDF pegboards offer a smooth surface that’s great for painting and lighter-duty applications. They’re budget-friendly and work well in craft rooms and offices.
Plastic pegboards are moisture-resistant, making them perfect for laundry rooms or anywhere humidity might be an issue.
Installation Success
Here’s what I wish someone had told me before my first installation: pegboards need space behind them for the hooks to fit through. Use furring strips or spacers to create that gap – it’s not optional, it’s essential.
Measure twice, drill once. Mark your stud locations, use appropriate fasteners for your wall type, and don’t skip the level. A crooked pegboard will drive you crazy every time you look at it.
Creative Accessories and Tools to Enhance Your Pegboard Organizer
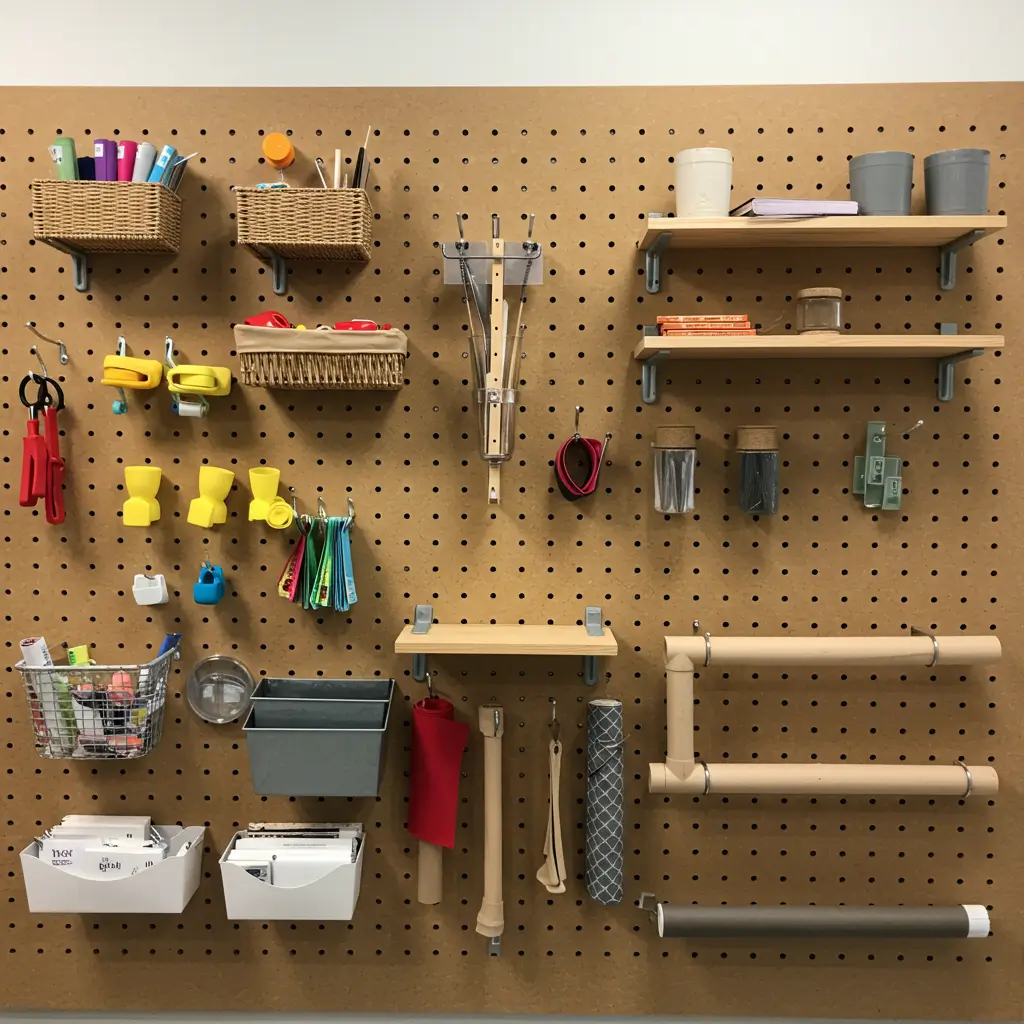
This is where pegboards get really exciting – the accessories. Think of them as the supporting cast that makes your organizational system shine.
Beyond Basic Hooks
Sure, hooks are pegboard staples, but don’t stop there. Small baskets corral loose items, magnetic containers hold metal bits and pieces, and adjustable shelves create display space for larger items.
Here’s a DIY trick that’ll blow your mind: cut PVC pipe into short sections to create holders for rolled papers, fabric, or even long-handled tools. Attach them with simple brackets, and you’ve got custom storage for a fraction of the cost.
Making It Personal
The best pegboards tell a story. Include some personality with small plants (succulents work great), favorite photos in small frames, or collections that make you smile. Storage doesn’t have to be sterile – make it a reflection of who you are.
Maintenance and Updating Your Pegboard Organizer
Here’s the beautiful thing about pegboards – they’re practically maintenance-free. A quick dusting every so often, maybe touching up paint if you’ve gone with a painted finish, and that’s about it.
But the real magic happens when you rearrange. As seasons change, projects evolve, or life shifts, your pegboard can adapt right along with you. No tools required, no permanent changes – just move things around until it works perfectly for your current needs.
Having trouble with sagging boards? Check your spacers and make sure you’ve hit the studs properly. Missing pegs? They happen – keep a few extras on hand for quick fixes.
Unlock Your Space’s Potential with a DIY Pegboard Organizer
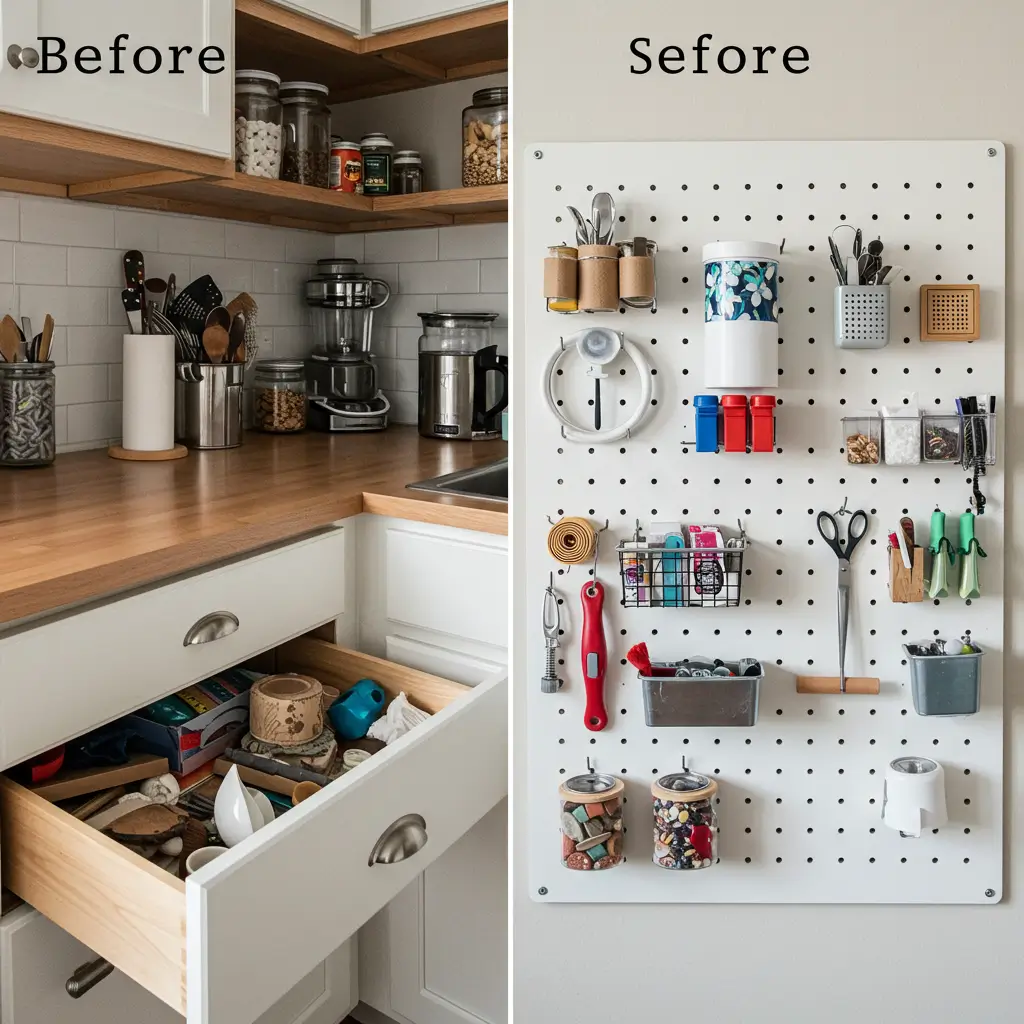
Here’s what I love most about pegboard organizers – they work for everyone. Whether you’re a DIY pro or someone who gets nervous around power tools, pegboards are forgiving and surprisingly addictive once you see the results.
This isn’t just about storage. It’s about creating systems that work with your real life. No more searching for things or buying duplicates of stuff you already own but can’t find.
Start small. Pick one frustrating area – that messy kitchen drawer or chaotic craft corner. Install one pegboard and watch how it transforms not just your space, but how you interact with your belongings.
Ready to start your pegboard journey? I’d love to hear about your projects! What room is driving you crazy with disorganization? What’s your biggest storage challenge? Share your ideas in the comments below – let’s problem-solve together and inspire each other to create spaces that truly work for our lives
Frequently Asked Questions About Pegboard Organizers
Over the years, I’ve gotten tons of questions about pegboards from readers who are just starting their organization journey. Here are the ones that come up most often:
Q: How much weight can a pegboard actually hold?
A: This really depends on your installation and material choice. A properly mounted wood pegboard can easily handle 20-30 pounds when distributed across multiple hooks and secured to wall studs. Metal pegboards can handle even more. The key is spreading the weight out – don’t hang everything in one spot. I’ve had tool collections hanging on mine for years without any sagging or issues.
Q: Do I really need those spacer strips behind the pegboard?
A: Yes, absolutely! I learned this the hard way on my first attempt. Without spacers, the pegs and hooks won’t fit through the holes properly. You need about 1/2 to 3/4 inch of space behind the board. Trust me, skipping this step will leave you frustrated and possibly needing to reinstall everything.
Q: Can I use pegboard in humid areas like bathrooms or laundry rooms?
A: Definitely! Just choose your materials wisely. Plastic or metal pegboards work great in humid spaces. If you’re set on wood, make sure it’s properly sealed with a moisture-resistant finish. I’ve installed several in laundry rooms and they’ve held up beautifully – just avoid placing them directly above washing machines where they might get splashed regularly.
Q: How do I keep hooks from falling out when I remove items?
A: Ah, the age-old pegboard frustration! A few solutions: First, buy quality hooks with better retention design. Second, you can add a small zip tie or wire through the hook to keep it in place. Some people even use a tiny dab of removable adhesive putty. The key is finding the balance between security and flexibility.
Q: What’s the best height to install a pegboard?
A: This depends on who’s using it and what you’re storing. For adults, I typically recommend the bottom edge at about 36-42 inches from the floor, which puts frequently used items at a comfortable eye level. For kids’ rooms, obviously go lower. The key is making sure the most-used items are in that sweet spot where you don’t have to reach up or bend down.
Q: Are there alternatives if I can’t drill into my walls?
A: Absolutely! You can create freestanding pegboard units, lean them against walls, or even hang smaller pegboards from existing hooks or nails. I’ve seen clever solutions using easel stands, or mounting pegboards to the sides of cabinets or workbenches. Renters, don’t despair – there are definitely options for you!
Have you tried any of these pegboard ideas? I’m always looking for new creative applications and would love to feature reader projects in future posts. Drop me a comment or send photos – your solution might be exactly what another reader needs!
.

