So there I was last March, standing in my guest bedroom at 2 AM (because that’s apparently when all my best decorating ideas strike), staring at the most boring beige wall you’ve ever seen. I’d been putting off doing something with that room for almost two years. The problem? I was absolutely terrified of wallpaper.
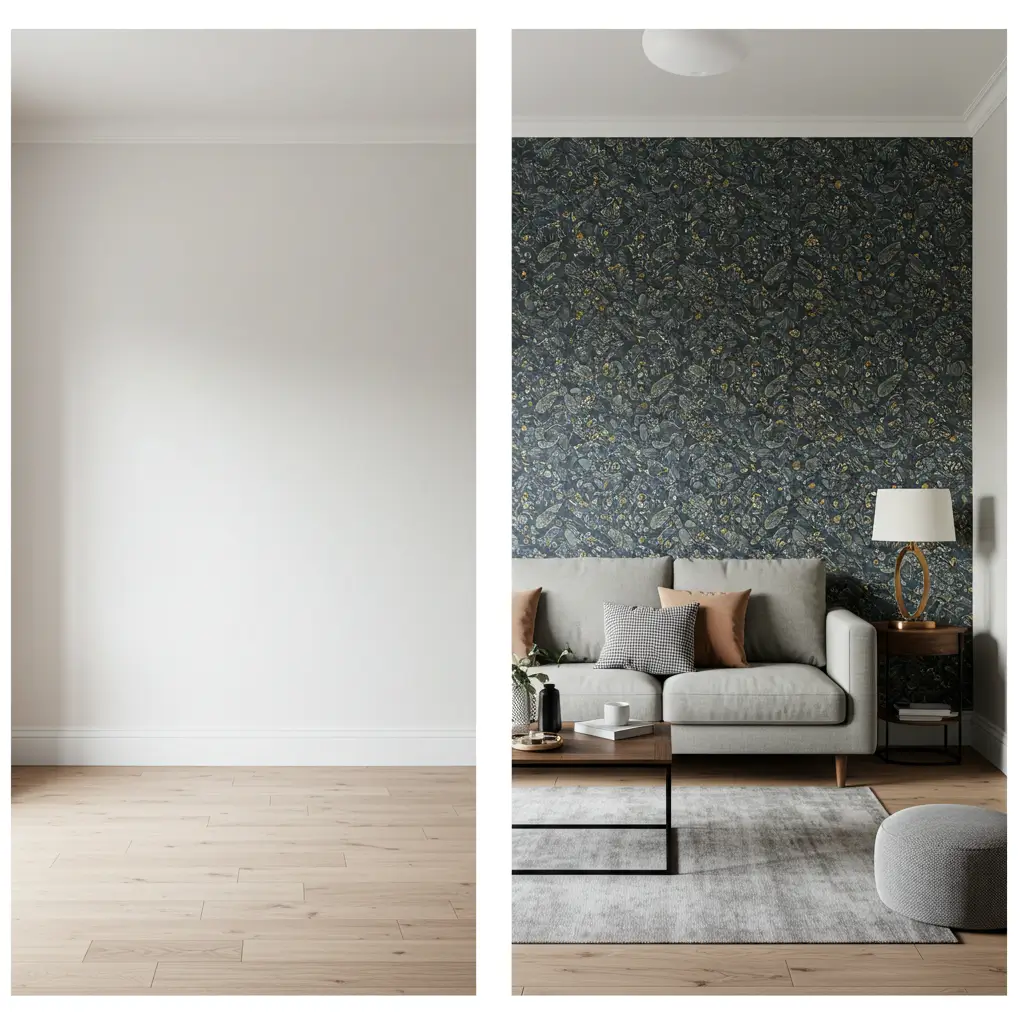
But here’s what changed everything – I discovered accent walls. Instead of wallpapering an entire room, I could choose just one wall to transform. Game changer, honestly. That guest room went from looking like a sad hotel room to being the space everyone compliments when they visit. And the best part? It took me exactly one Saturday afternoon and cost less than $300.
I’ve now done accent walls in four different rooms, and I’ve learned some hard-won lessons along the way. Like the time I chose a pattern so busy it literally gave my mother-in-law a headache. Or when I discovered that measuring twice really does mean you should cut once, especially with $80-per-roll wallpaper.
If you’re ready to dip your toes into the wallpaper world without the full commitment, let me walk you through everything I wish I’d known before that first project.
Why Accent Walls Work (And Why I’m Obsessed)
An accent wall gives you all the impact with about 75% less commitment and cost. You’re using maybe 2-3 rolls instead of 8-12, and if you hate it? Well, you’ve only got one wall to deal with.
I once helped my neighbor Carol transform her living room just by wallpapering the wall behind her sofa. We’re talking about $150 in materials and four hours of work, but guests now walk into that room and immediately comment on how “designed” it looks. Before, it was just furniture floating in space.
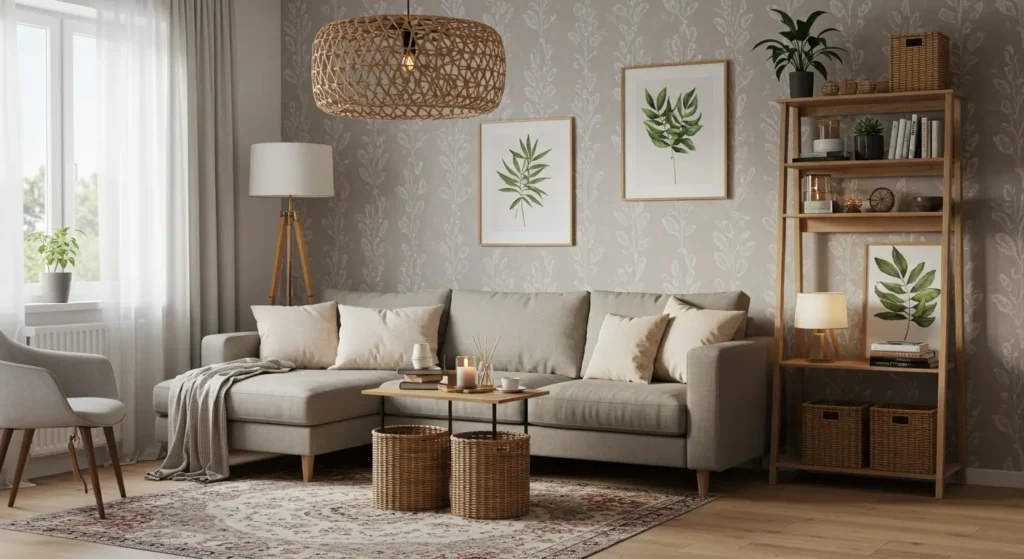
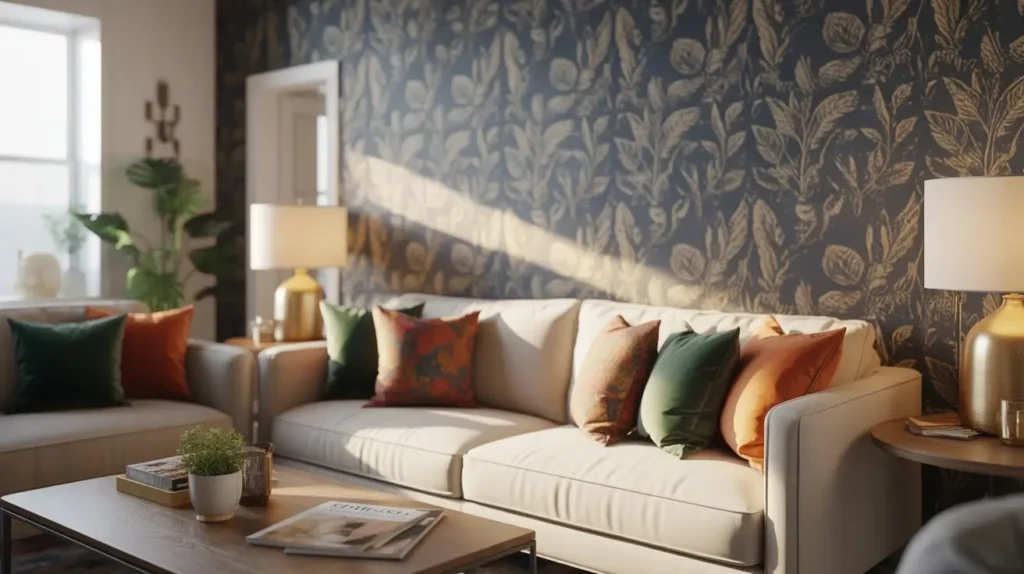
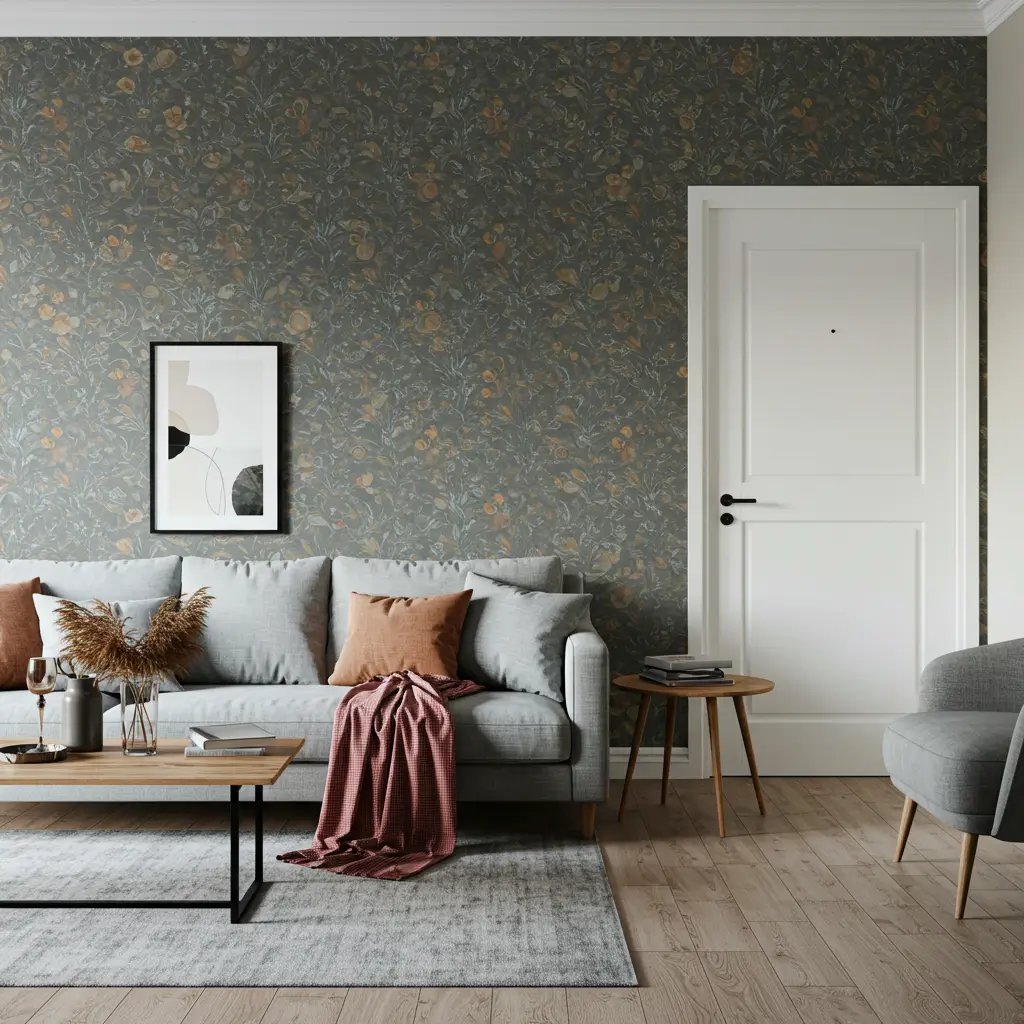
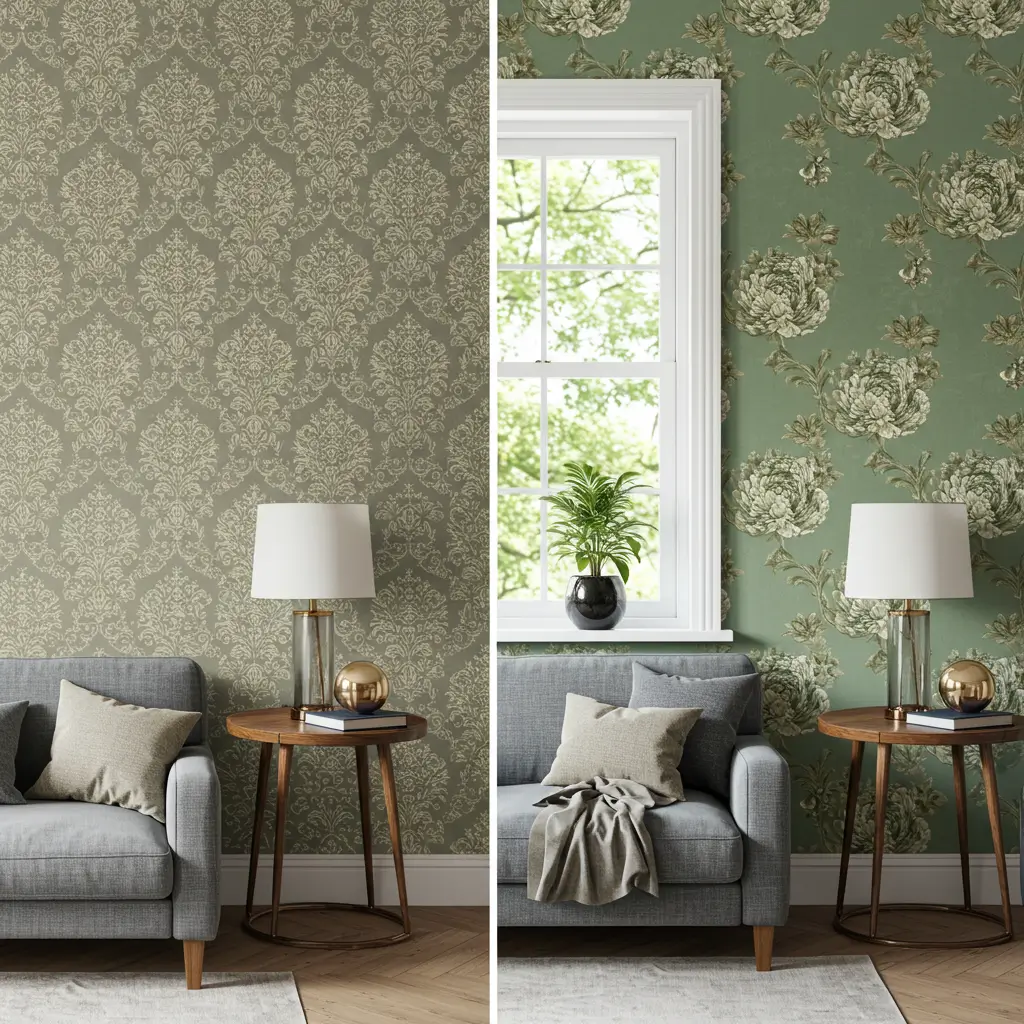
Plus, accent walls let you experiment with patterns or colors you’d never commit to on a larger scale. That bold geometric print that caught your eye? Perfect for one wall. That dramatic dark floral? Absolutely stunning as a backdrop for your bed.
Choosing Your Wall: The Foundation Decision
Here’s where I made my first big mistake – I picked a wall because it was easiest to reach, not because it made design sense. Don’t be like me in 2015.
The best accent walls are usually the ones you see when you first enter a room. In bedrooms, it’s typically the wall behind the headboard. In living rooms, I’ve had great success with the wall behind the sofa or opposite the main entrance.
Here’s my practical test: stand in the doorway and note which wall your eye naturally goes to first. That’s usually your winner. Also consider which wall has the fewest obstacles – light switches, outlets, and windows can make installation trickier.
Pattern Play: What Works and What Doesn’t
Real talk – I have made some spectacularly bad pattern choices over the years. That guest room I mentioned? The first wallpaper was this intricate damask pattern that looked stunning in the sample, but on an entire wall? It was like staring into a kaleidoscope.
Here’s what I’ve learned through trial and error:
Large-scale patterns work better than you think. I was scared of big prints initially, but they actually read as more sophisticated and less busy than small, repetitive patterns. That Morris-inspired botanical in my living room has 8-inch flowers, and it feels way more serene than the tiny rosebud print I tried years ago.
Geometric patterns are forgiving friends. Stripes, hexagons, large florals with geometric layouts – these hide installation imperfections better than organic patterns. I once spent three hours trying to match paisley perfectly, and you could still see seams. With geometric patterns, small misalignments look intentional.
Test your pattern tolerance. Order a sample and live with it taped to the wall for at least a week. That gorgeous pattern perfect on Tuesday might drive you bonkers by Monday. Ask me how I know.
Color Confidence: Beyond Safe Choices
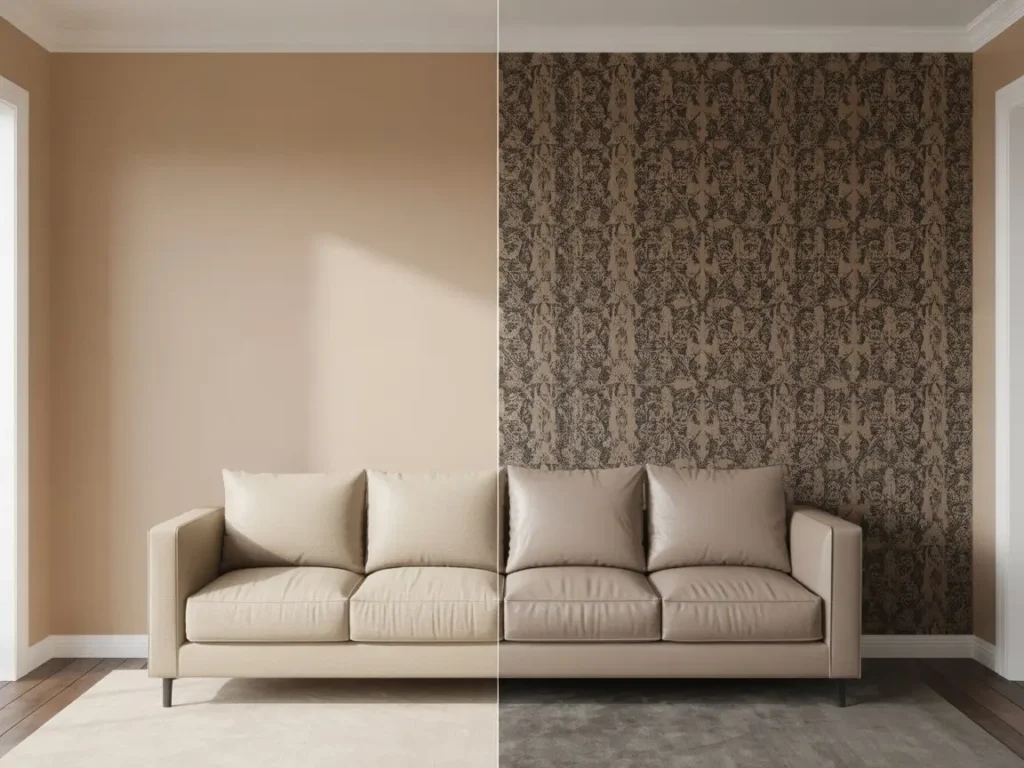
I used to stick to safe, neutral wallpapers – soft grays, barely-there patterns. But I wish someone had told me earlier how much joy bold color can bring to a space.
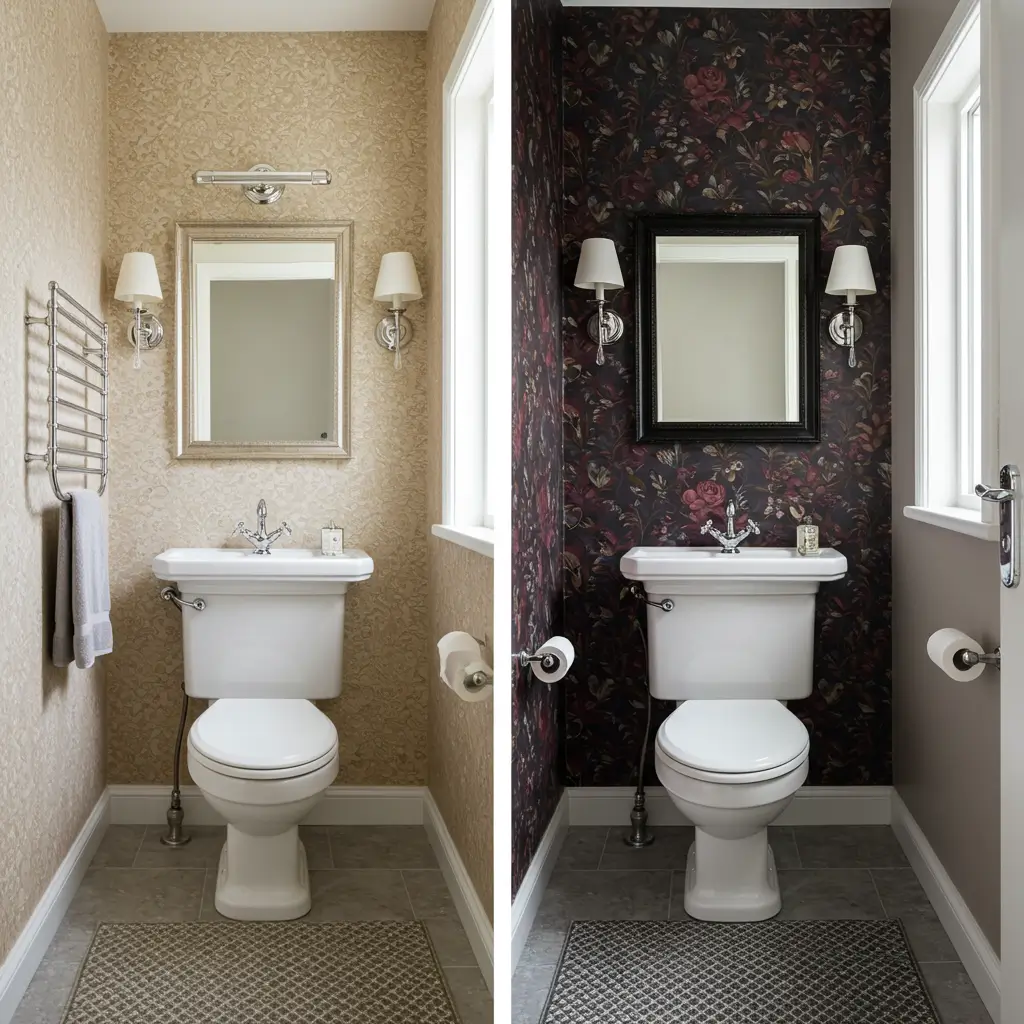
My breakthrough was in our powder room. I chose this deep, moody floral in charcoal and burgundy – something I’d never consider for a larger space. In that tiny room? It feels like stepping into a jewel box. I get more compliments on that wallpaper than anything else in our house.
Here’s how I think about color: warm colors (reds, oranges, deep yellows) make spaces cozy – perfect for dining rooms or bedrooms. Cool colors (blues, greens, purples) can make small spaces feel larger and work great in bathrooms. Neutrals aren’t boring if you choose ones with personality.
One trick from my friend Lisa: take photos of your room at different times and look at wallpaper samples against those photos. That warm beige might look perfect at noon, but it turns muddy under evening lighting.
Installation Reality Check
Let’s talk about the actual process. I’ve installed wallpaper in seven rooms, and preparation really is 90% of success.
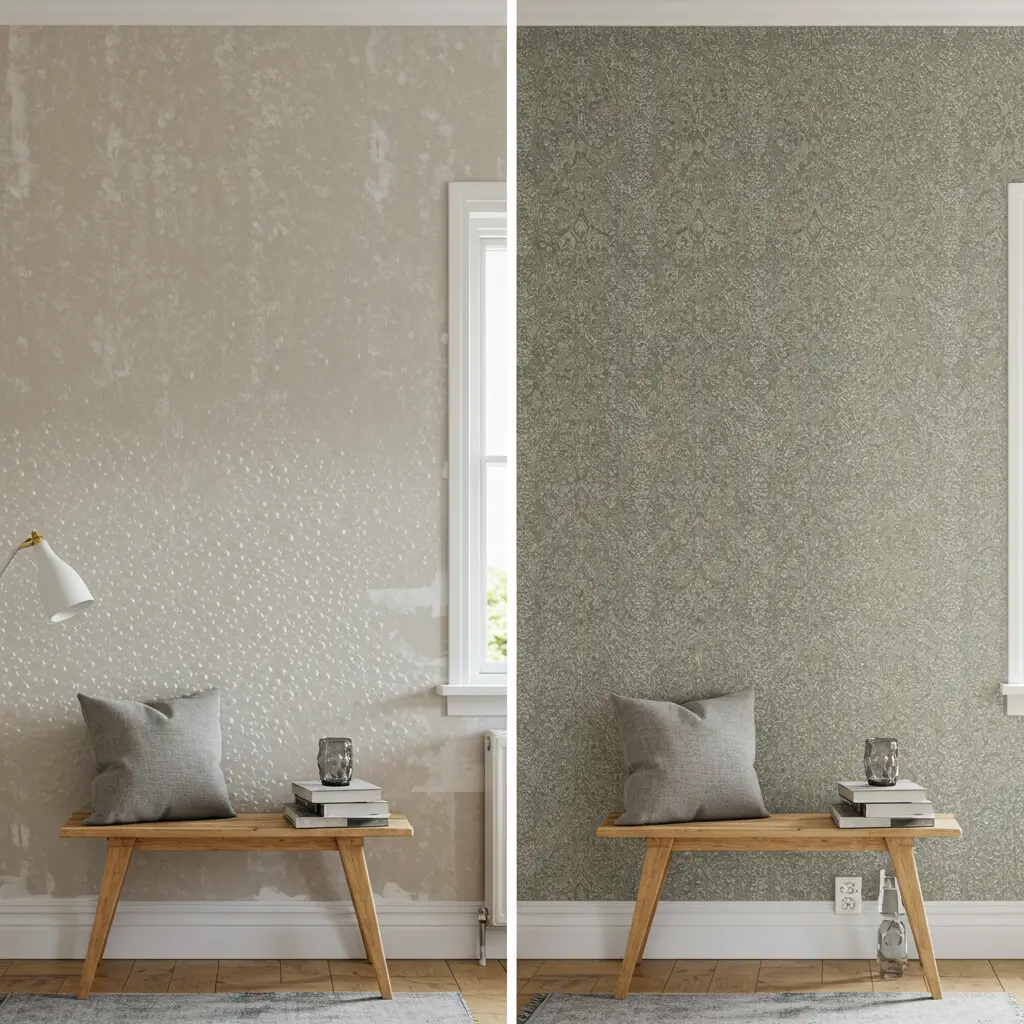
Tools you actually need: a good smoothing tool ($8 at Home Depot), a sharp utility knife with extra blades, a level, a pencil, and primer designed for wallpaper. Don’t skip the primer – I learned that lesson when my first attempt peeled off in sheets after six months.
My realistic timeline for a standard accent wall: Plan for a full day. Start around 9 AM, take a lunch break, and finish around 4 PM. Rushing wallpaper is like rushing bread dough – it doesn’t work.
The process: measure and mark your starting point (I always start in the least visible corner), cut strips 4 inches longer than needed, apply adhesive if needed, position carefully at the top, and smooth downward. Work out bubbles as you go – fixing them later is frustrating.
Your first strip will take forever. By the third strip, you’ll find your rhythm. By the last strip, you’ll feel like a pro.
Problem-Solving: When Things Go Wrong
Let me tell you about the Great Wallpaper Disaster of 2019. I was installing gorgeous botanical print, feeling confident, when I realized I’d been installing strips upside down. I had to remove four strips of $60-per-roll wallpaper and start over. I actually cried a little.
But here’s what I learned: most problems are fixable, and when they’re not, it’s not the end of the world.
Bubbles happen. Small ones often disappear as the adhesive dries. For larger ones, carefully puncture with a pin and smooth out the air. Seams can be tricky. If you can see seams between strips, you need more overlap or firmer rolling. Pattern matching isn’t perfect. Small misalignments are rarely noticeable unless you’re looking for them.
The Real Cost Breakdown
For a typical accent wall (about 120 square feet):
- Wallpaper: $150-400 (2-4 rolls at $45-120 each)
- Supplies: $50-70 (primer, adhesive, tools)
- Professional installation: $300-800 if you hire someone
My sweet spot is usually $250-350 for DIY with good-quality wallpaper. Compared to other makeover options, it delivers incredible impact for the investment.
My Current Favorites and Where to Find Them
For budget-friendly options, I love some peel-and-stick wallpapers available now. I used a gorgeous geometric from Target in our powder room ($35 per roll), and it’s held up beautifully for over a year.
For traditional wallpaper, I keep going back to Sherwin-Williams for mid-range options ($45-80 per roll) and Anthropique for splurge patterns ($120+ per roll for small spaces). Home Depot has really stepped up its game – I found amazing textured neutral there for $38 per roll.
Online, I love Spoonflower for unique patterns, though I always order samples first. Thrift stores can be goldmines for vintage wallpaper, too.
Frequently Asked Questions
Q: How do I know if my wall is ready for wallpaper? A: Your wall needs to be clean, smooth, and primed. I always use primer specifically designed for wallpaper – it’s like insurance. If you’ve got texture or imperfections, lightweight spackle and light sanding are your friends.
Q: What about peel-and-stick wallpaper? A: I was a snob about it initially, but newer options are impressive. Super easy installation, no adhesive mess, and most are removable. Perfect for renters or testing patterns. Just don’t expect the exact same luxe feel as traditional wallpaper.
Q: Help! My wallpaper is bubbling. A: Don’t panic. Small bubbles often work themselves out as adhesive dries – give it 24-48 hours. For larger bubbles, carefully puncture with a tiny needle and smooth out the air.
Q: Can I put wallpaper in a bathroom? A: Absolutely, but use vinyl or vinyl-coated papers – they handle moisture better. I learned this when the regular paper started peeling in our guest bathroom after a year of shower steam.
Q: What’s your biggest wallpaper regret? A: Not trusting my instincts about pattern scale. I once used a tiny floral that looked gorgeous as a sample, but just looked busy on the wall. When in doubt, go bigger with your pattern, not smaller.
Looking Forward
You know, as I’m writing this, I’m staring at that guest room accent wall that started this whole journey. It’s been up for almost two years, and I still love seeing it. That’s really the test – not installation perfection, but how it makes you feel in the space.
If you’re sitting there like I was, staring at a boring wall and wondering if you’re brave enough to try wallpaper, let me tell you – you absolutely are. Start with something you love, take your time, and remember that personality matters more than perfection. The worst thing that can happen is that you’ll need to start over. But the best thing? You’ll create a space that makes you smile every day.