How to Make a Macrame Plant Hanger – realistic flat lay photography of essential materials on a clean white wooden table. Include: natural beige cotton macrame cord (3-5mm thickness) partially unrolled showing texture, wooden ring (2-3 inches diameter) with visible wood grain, sharp crafting scissors with black handles, measuring tape partially extended, small potted green plant (pothos or similar) in terracotta pot.
Soft natural lighting from window, minimal shadows, Pinterest-worthy styling. Items arranged aesthetically but not perfectly organized, showing they’re ready to be used. High resolution, professional photography style, warm and inviting atmosphere. Shot from above at 45-degree angle.
What You’ll Learn Today:
- Essential materials you need (spoiler: it’s simpler than you think!)
- Basic knots that form the foundation of any macrame project
- Step-by-step assembly that turns a simple cord into functional art
- Styling tips to make your creation Instagram-worthy
- Common mistakes to avoid (learn from others’ trial and error!)
Why Macrame Plant Hangers Are Having Their Moment
If you’ve been anywhere near Pinterest or home decor blogs lately, you’ve probably noticed that macrame is everywhere. But this isn’t just another fleeting trend – it’s part of a larger movement toward mindful living and handmade happiness.
Think about it: in our hyper-digital world, there’s something almost therapeutic about the simple act of tying knots. It’s meditative, it’s tactile, and at the end, you have something beautiful and functional. Plus, with more of us embracing our inner plant parent (hello, millennial plant obsession!), macrame hangers solve that age-old problem of limited surface space while adding vertical visual interest.
Here’s what I love most about macrame plant hangers – they’re incredibly forgiving. Unlike pottery or painting, where one wrong move can ruin everything, macrame lets you adjust, untie, and start again. It’s the perfect craft for perfectionists who need to learn to embrace beautiful imperfection.
What You’ll Need to Get Started
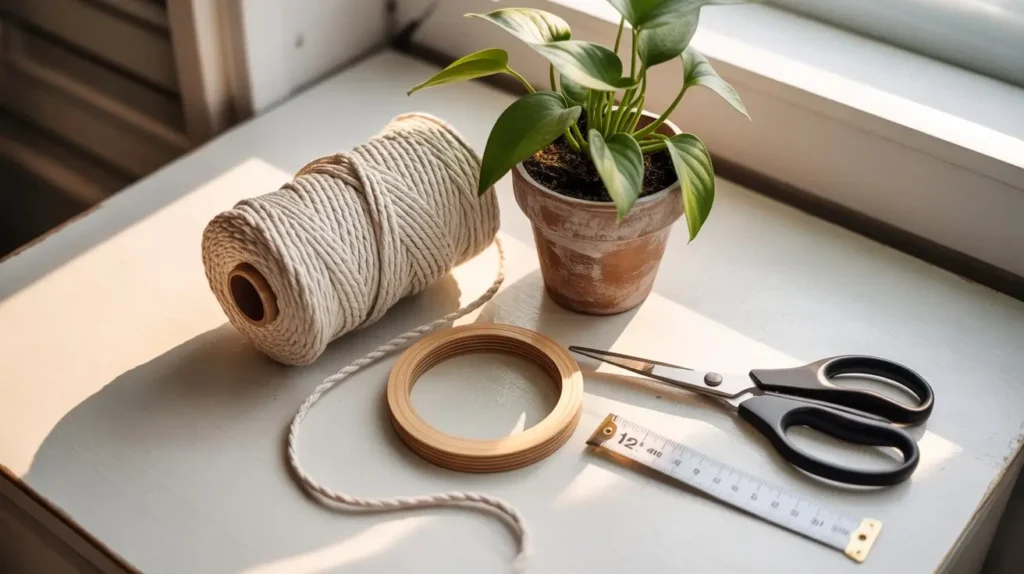
Essential Materials:
- Macrame cord: 3-5mm cotton rope (about 80 feet total for one hanger)
- Metal or wooden ring: 2-3 inches in diameter (the “crown” of your hanger)
- Sharp scissors: For clean cuts that won’t fray
- Measuring tape: Precision matters more than you’d think
- Your favorite plant: In a pot with drainage (obviously!)
Pro tip: Start with natural cotton cord – it’s easier to work with than synthetic materials and ages beautifully. You can always get fancy with colored or textured cords later!
Now, I know what you might be thinking: “But I’m not crafty!” Trust me, I’ve heard this from countless people who went on to create stunning pieces. The beauty of macrame is that it’s essentially just fancy knot-tying, and if you can tie your shoes, you can learn these basic knots.
The Essential Knots Every Beginner Needs
Before we dive into assembly, let’s talk about the two knots that will become your best friends:
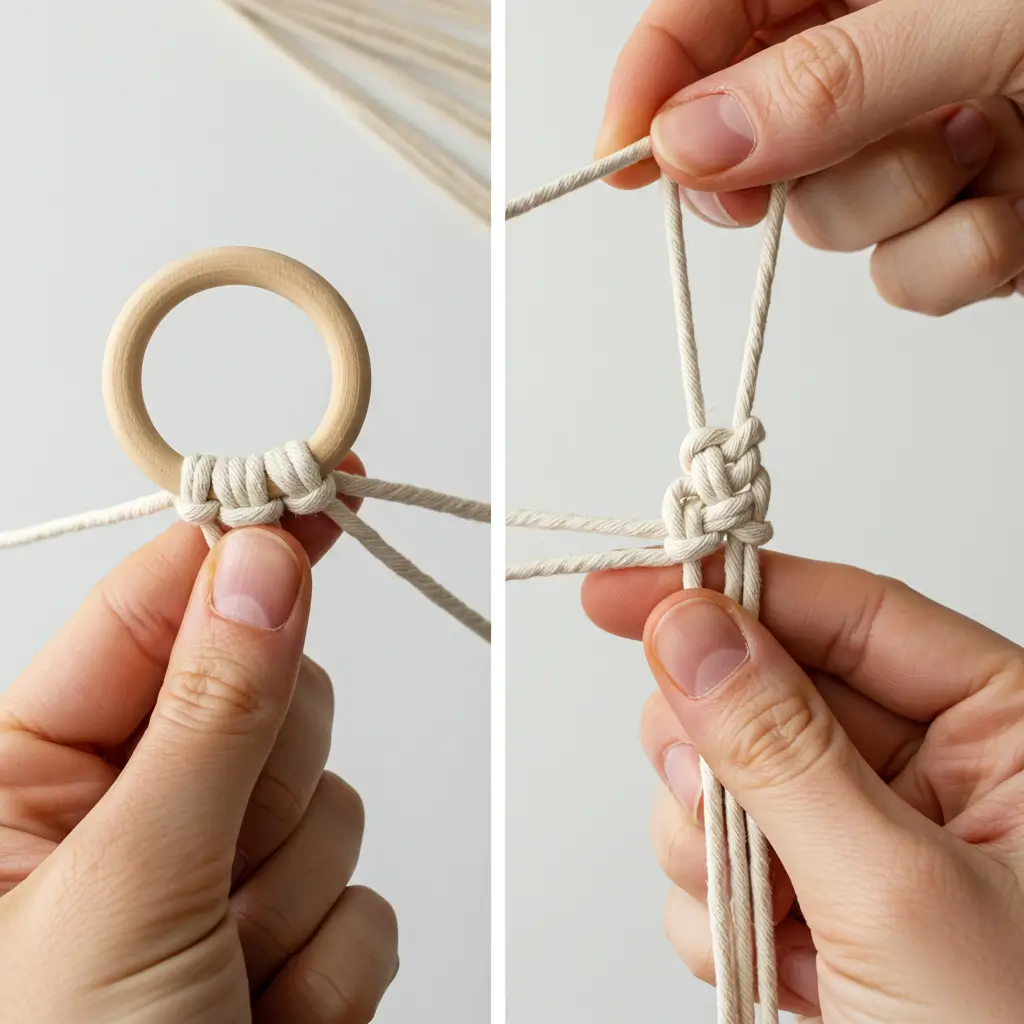
The Lark’s Head Knot: This is how you’ll attach your cords to the ring. Think of it as the foundation of your entire project. It might sound fancy, but it’s just folding your cord in half and pulling the loop through – like threading a belt through a belt loop.
The Square Knot: This is where the magic happens. It’s the decorative knot that creates those beautiful patterns you see in finished pieces. The rhythm is simple: right over left, then left over right. Once you get the hang of it, it becomes almost meditative.
Beginner’s Secret: Don’t worry about making perfect knots right away. The beauty of handmade pieces is in their slight irregularities – they add character and prove it was made by human hands, not a machine!
Step-by-Step Assembly (The Fun Part!)
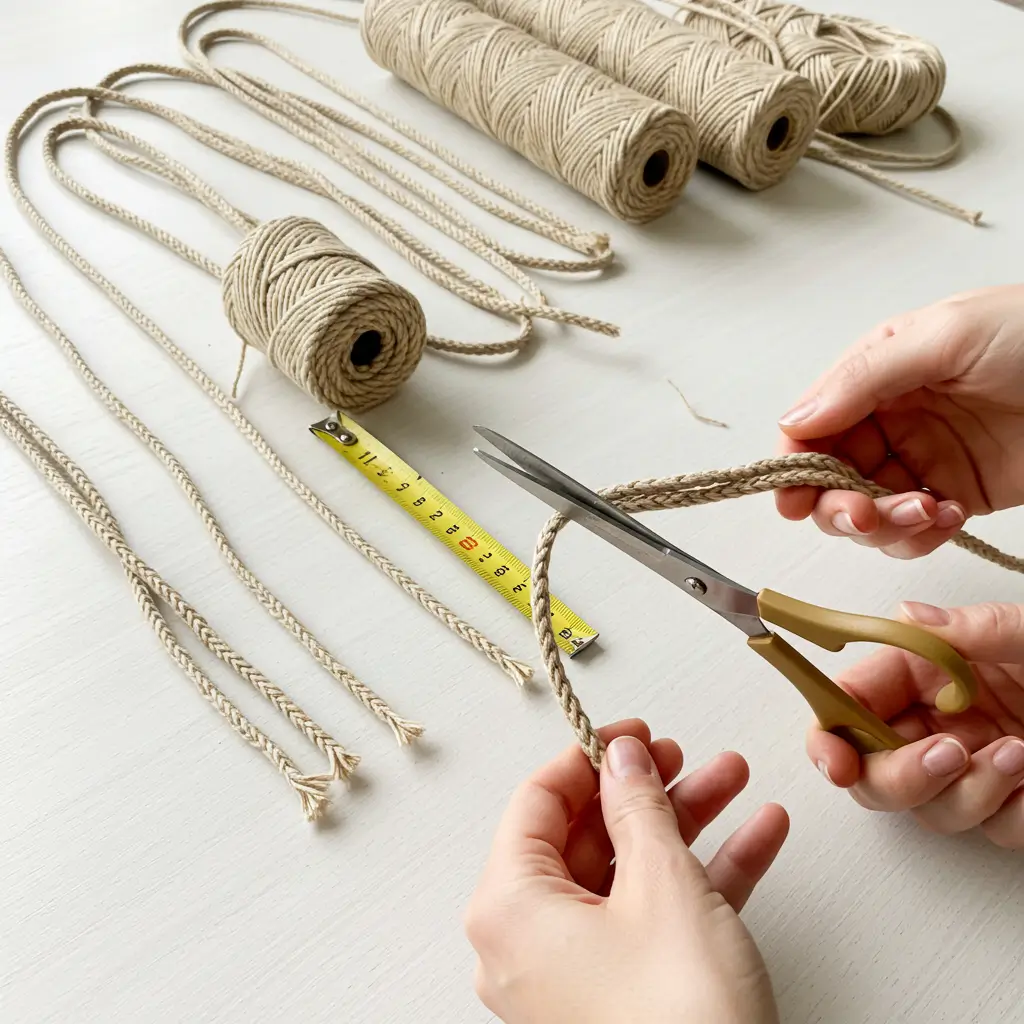
Step 1: Prep Your Cords
Cut eight pieces of cord, each about 10 feet long. Yes, it seems like a lot, but trust the process – you’ll need every inch, and it’s better to have too much than too little.
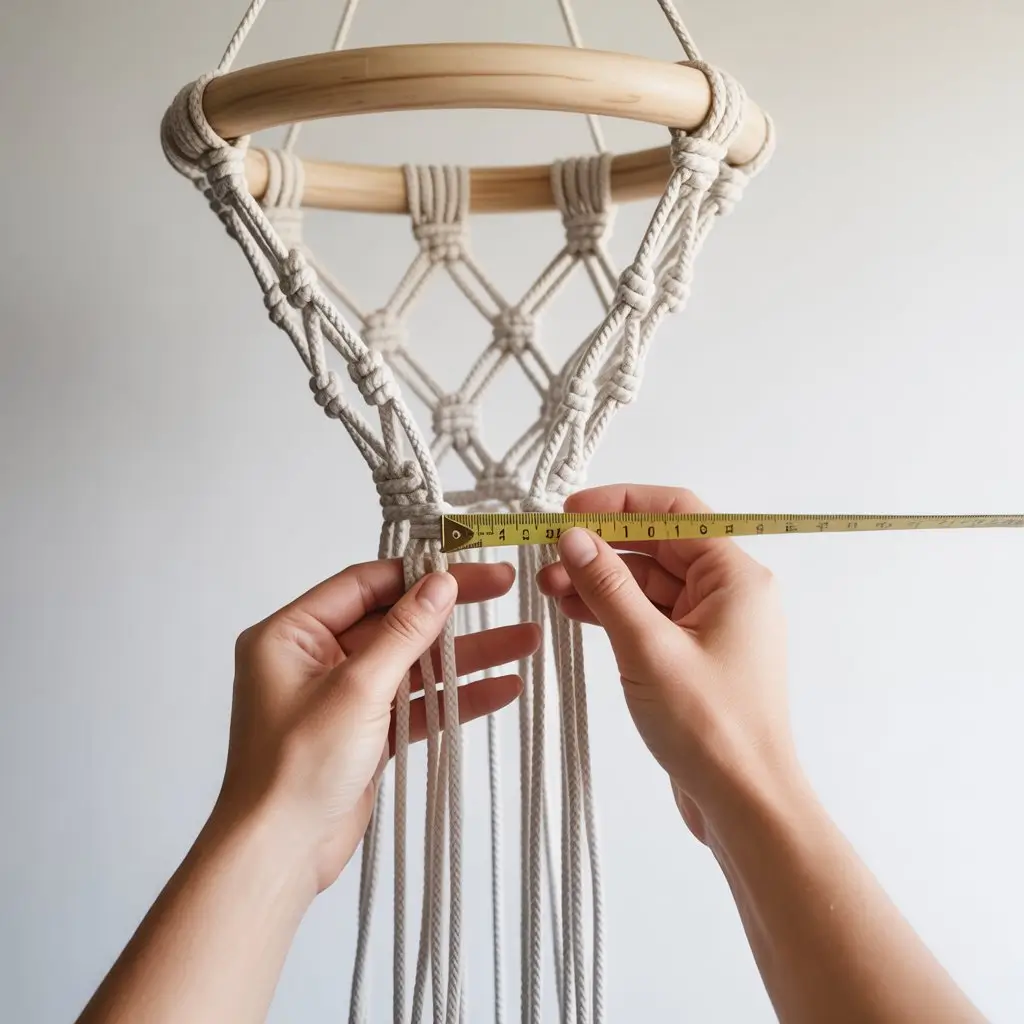
Step 2: Attach to Your Ring
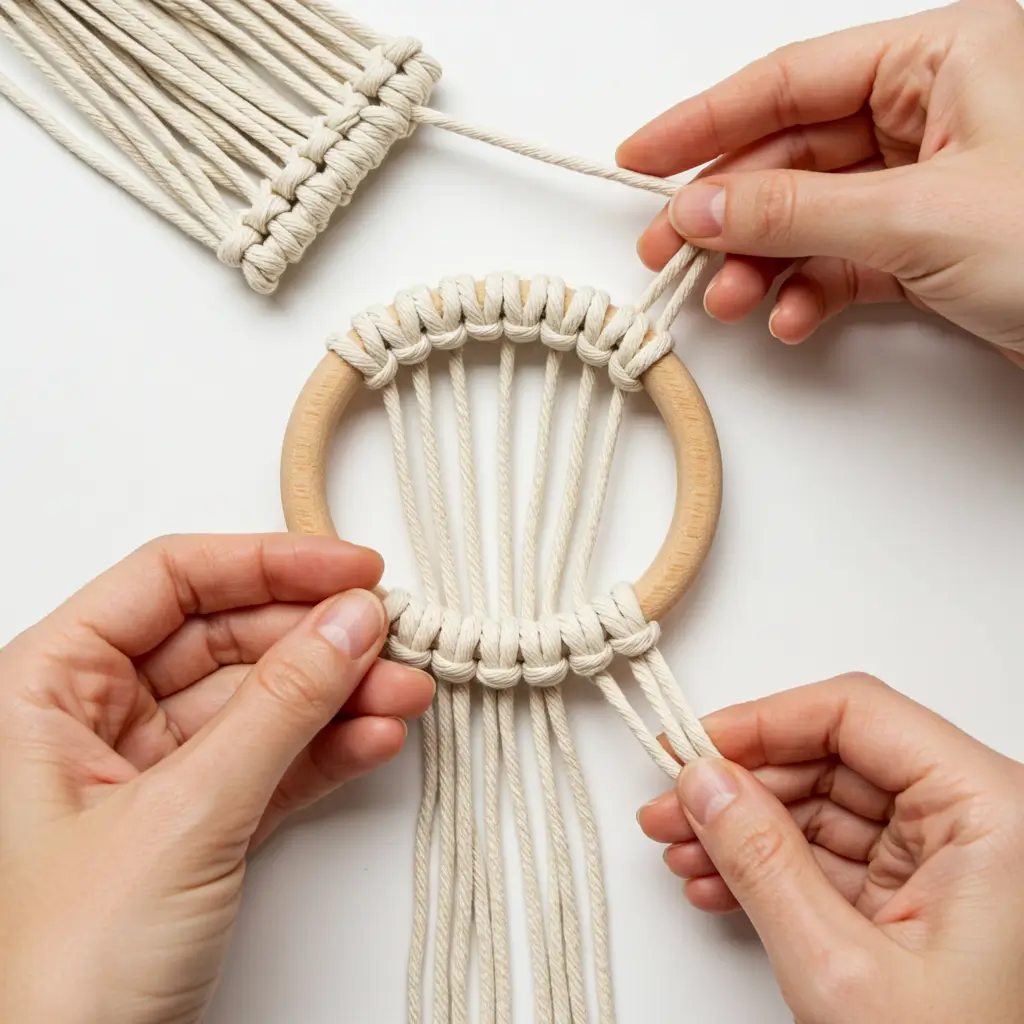
Using the lark’s head knot, attach all eight cords to your ring. You’ll end up with 16 working strands hanging down. Take a moment to arrange them evenly around the ring – this sets the foundation for everything that follows.
Step 3: Create the First Row of Knots
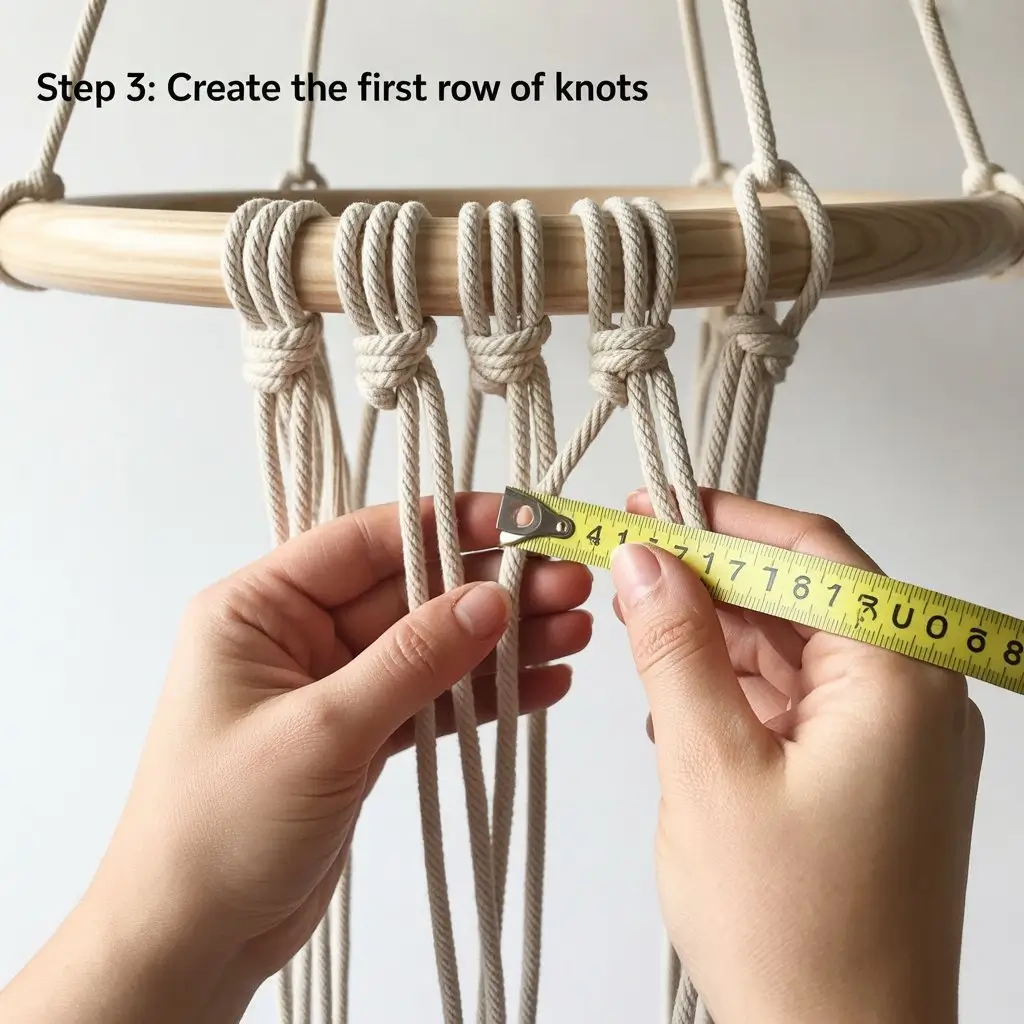
About 6 inches down from the ring, start tying square knots. Work with groups of four strands, creating four separate knots around the circumference. This is where you’ll begin to see the structure taking shape.
Step 4: Form the Plant Cradle
Here’s where it gets exciting – you’re creating the actual cradle that will hold your plant! About 4-5 inches below your first row, it’s time to mix things up. Instead of using the same groups of four, you’ll split them differently. Take two strands from one group and two from the adjacent group to create new square knots. This creates that beautiful diamond pattern you see in professional pieces.
Step 5: The Final Gathering
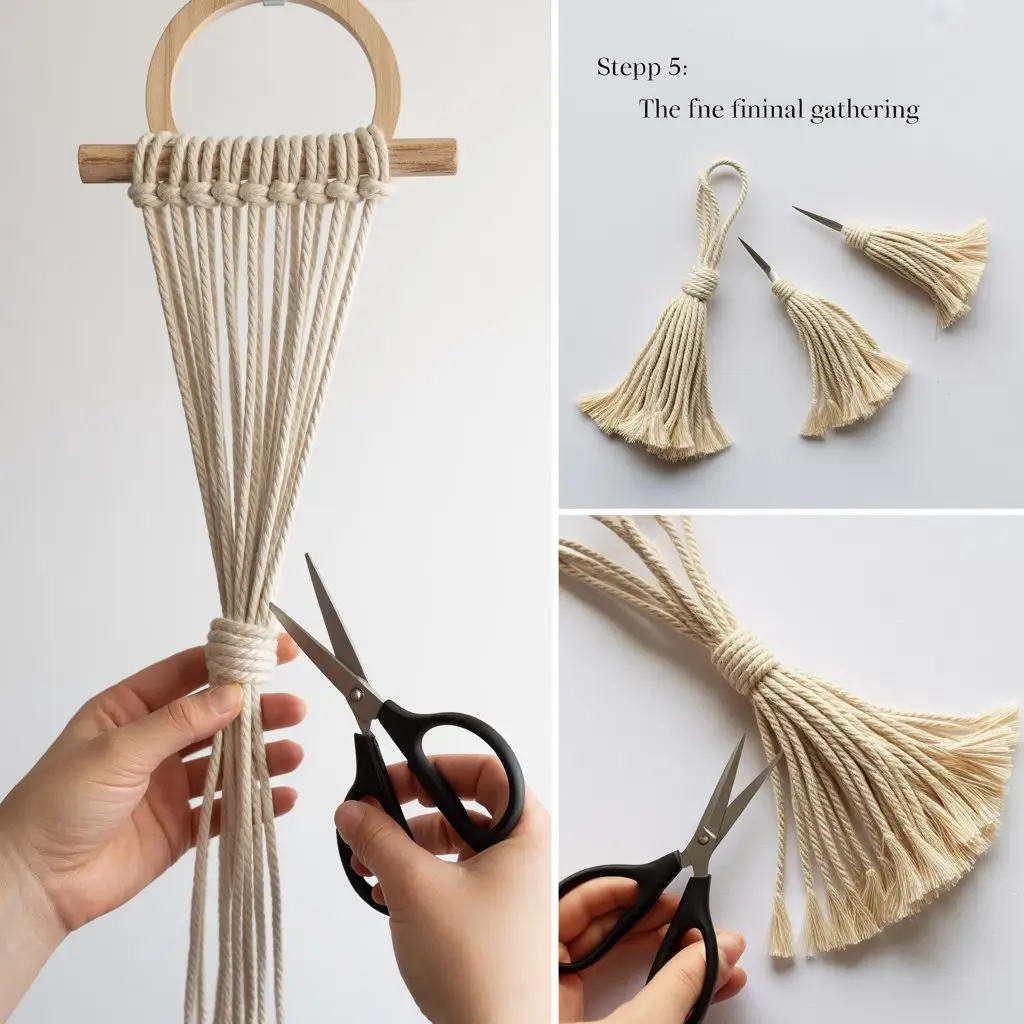
About 3-4 inches below your cradle knots, gather all 16 strands together and tie one large finishing knot. Then comes the fun part – trimming the ends to your desired length. Some people like long, flowing tassels; others prefer a clean, minimal look. There’s no wrong choice here!
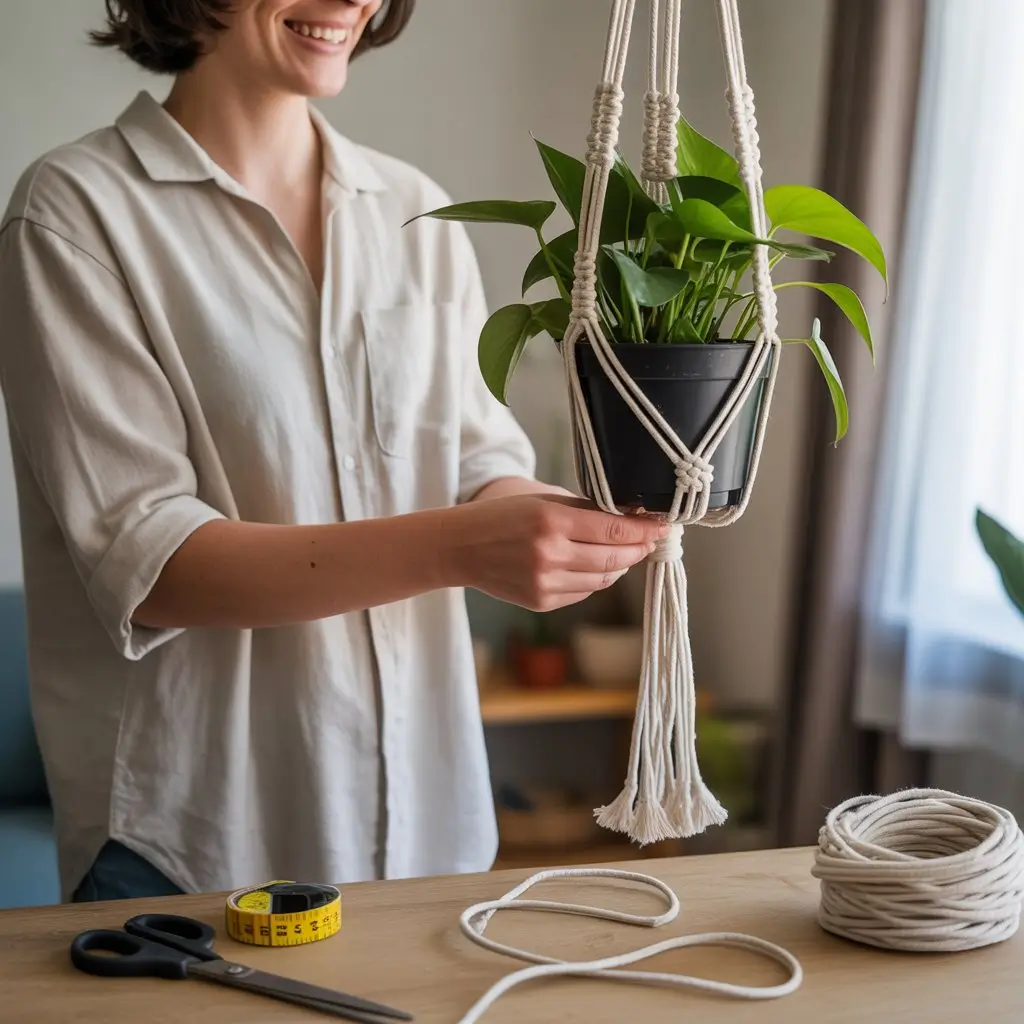
Making It Your Own
Here’s where your personality gets to shine through. The basic structure I’ve outlined will give you a beautiful, functional plant hanger, but don’t stop there! Consider adding wooden beads between knots for a bohemian touch, or experiment with different cord colors for a more modern look.
One of my favorite current trends is the “imperfect perfection” movement, where slight variations and organic irregularities are celebrated rather than hidden. Your first macrame hanger might not look exactly like the ones you see on Pinterest, and that’s exactly what makes it special.
Common Beginner Challenges (And How to Handle Them)
Let’s be honest – your first attempt might not go exactly as planned, and that’s completely normal! The most common issue I see is uneven tension, where some knots are tight and others are loose. The solution? Take your time and check your work as you go. If something looks off, don’t be afraid to untie and redo it.
Another challenge is getting the cradle sizing right. If your first attempt is too loose or too tight for your plant, simply adjust the spacing between knots on your next hanger. Remember, this is a skill that improves with practice.
Reality Check: I’ve never met anyone who got macrame perfect on their first try. Embrace the learning process – those “mistakes” often lead to beautiful variations you never would have planned!
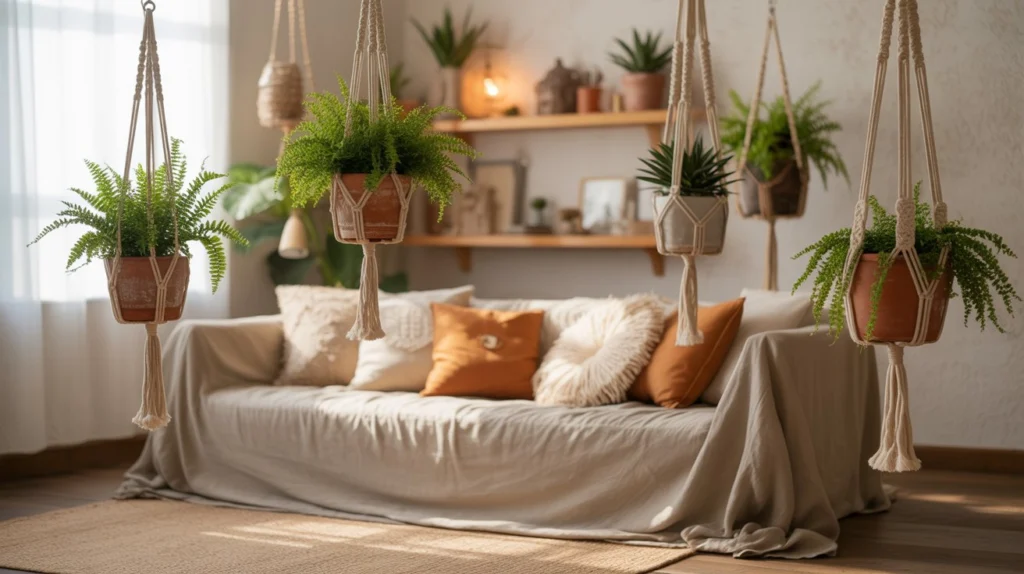
Styling Your New Creation
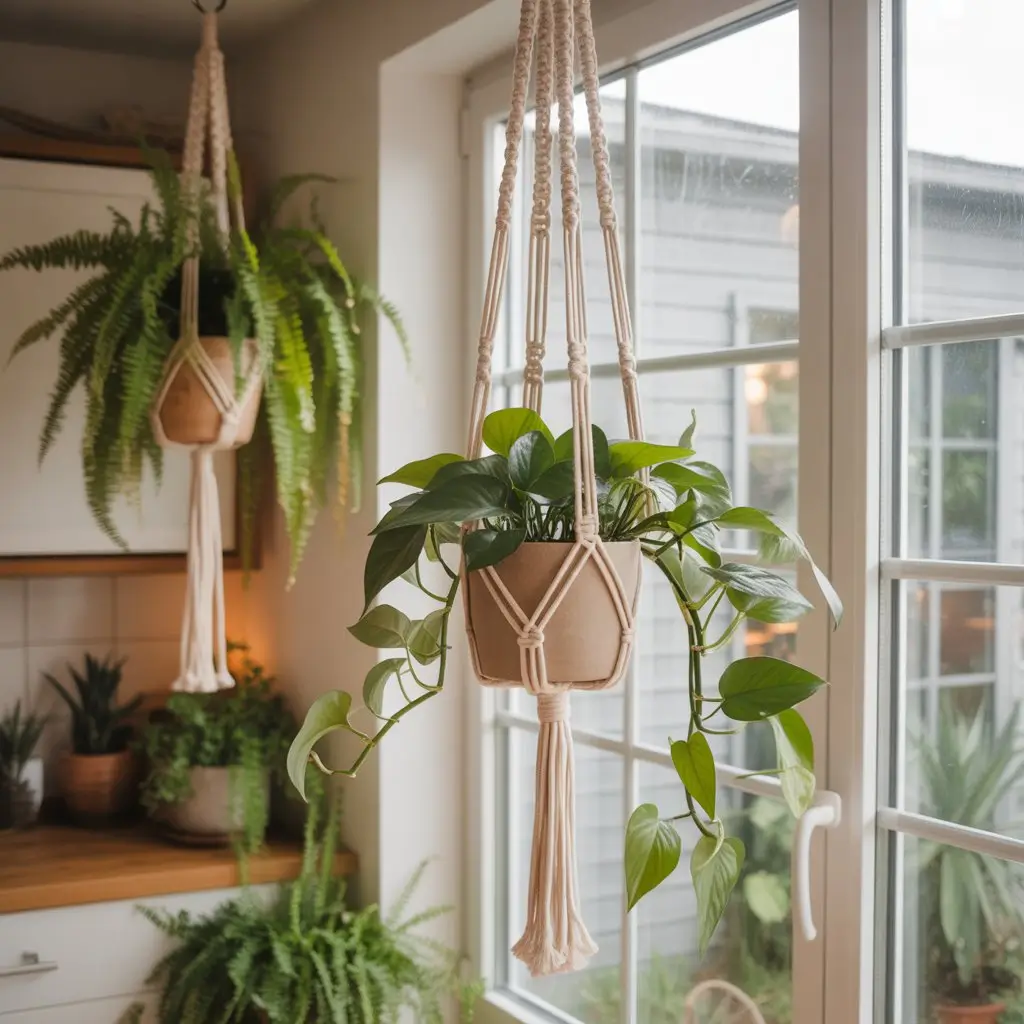
Now comes the best part – finding the perfect spot for your handmade hanger! Near a bright window is always a winner, but don’t overlook unexpected spaces. I’ve seen gorgeous installations in bathrooms (hello, humidity-loving plants!), bedrooms, and even kitchens where herbs can live stylishly while staying within reach.
Consider the height carefully – you want your plant to be at eye level or slightly above for maximum visual impact. And here’s a styling secret: odd numbers look more natural, so if you’re planning multiple hangers, think in terms of one, three, or five rather than pairs.
Ready to Start Your Macrame Journey?
Creating your first macrame plant hanger is just the beginning of what could become a deeply satisfying hobby. The skills you learn here translate to wall hangings, table runners, and countless other projects that can transform your living space.
Your Next Steps:
🌿 Gather your materials and set aside a relaxing afternoon
🌿 Start with one simple hanger to build confidence
🌿 Share your creation on social media – tag other makers!
🌿 Explore more macrame tutorials once you’ve mastered the basics
The Deeper Satisfaction of Making
As you tie your final knot and step back to admire your creation, you’ll experience something that no store-bought item can provide – the deep satisfaction of creating something beautiful with your own hands. In our world of instant everything, there’s profound value in slowing down, focusing on a simple repetitive task, and ending up with something that’s uniquely yours.
Your macrame plant hanger won’t just hold a plant – it’ll have the memory of the afternoon you spent learning something new, the pride of completing your first handmade home decor, and the promise of more creative projects to come.
Every time a friend asks, “Where did you get that gorgeous hanger?” you’ll get to say with a smile, “I made it myself.” And trust me, that never gets old.
So grab some cord, pick out a plant, and let’s get knotting. Your walls are waiting for something beautiful, and your hands are ready to create it.
Happy crafting, and remember – the best macrame hanger is the one you actually make, not the perfect one you only dream about!