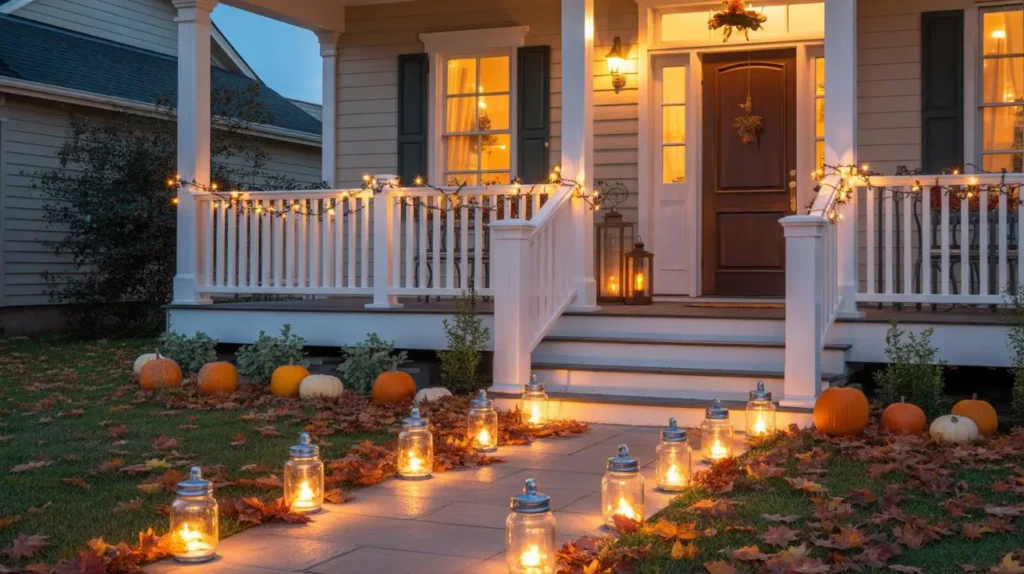
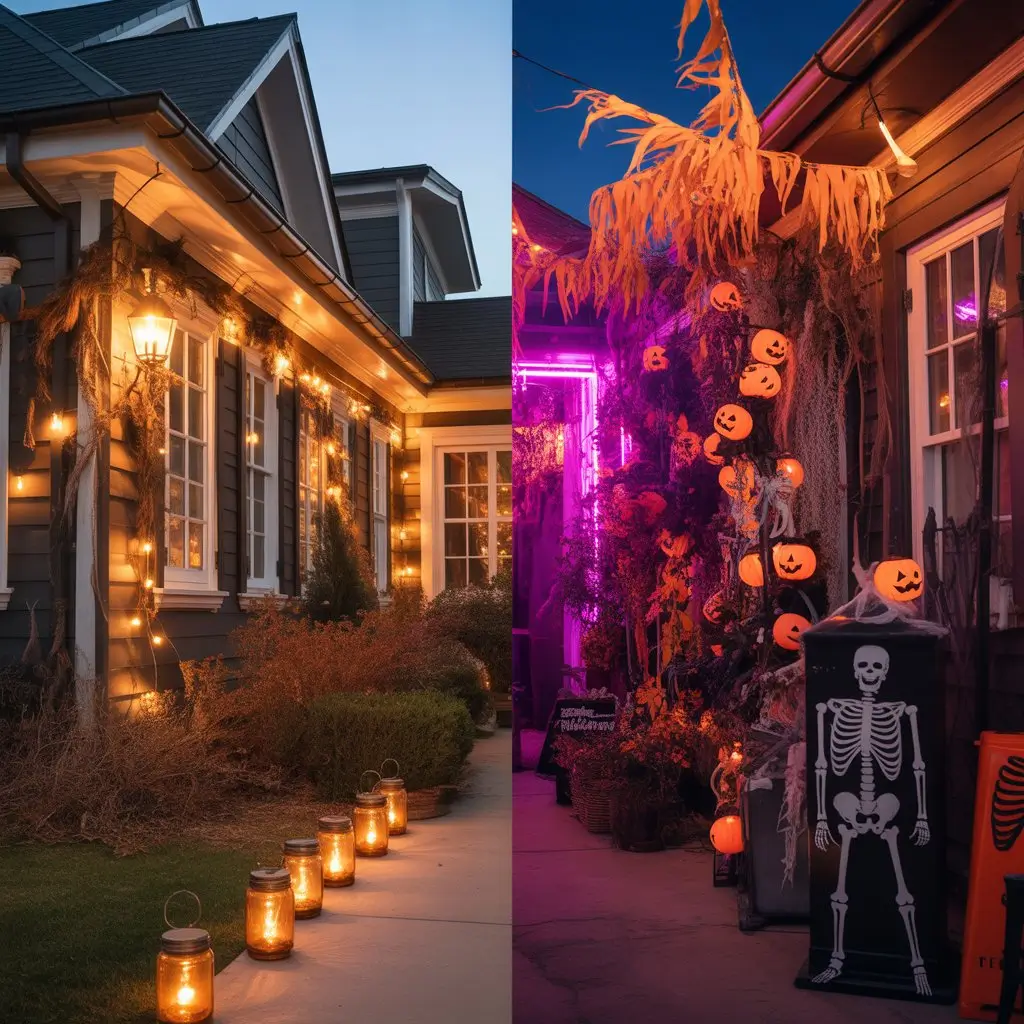
Two weeks ago, I was driving through our Portland neighborhood with my daughter when she pointed to a house and said, “Mom, that one looks like a movie set!” The homeowners had created this incredible moody atmosphere with nothing more than some warm string lights, a few strategically placed lanterns, and what looked like mason jars glowing softly along their walkway. It was Halloween magic—sophisticated, inviting, and absolutely gorgeous.
Then we passed another house that looked like a Halloween store explosion. Harsh purple lights, strobing effects, and those awful plastic decorations that cost a fortune and look cheap. My daughter wrinkled her nose and said, “That one just looks… trying too hard.”
That conversation reminded me why I fell in love with creating atmospheric Halloween lighting in the first place. About nine years ago, I was frustrated with the same choice every October—either go full kiddie-cute with smiling pumpkins or embrace the haunted house horror show. But there’s this beautiful middle ground where you can create genuine spookiness that’s also stylish and sophisticated.
I’ll be honest—my first attempts at “elevated” Halloween decorating were disasters. I once spent $85 at Target on what I thought were classy Halloween lights, only to realize they made our house look like an orange traffic cone. Mark still teases me about the year I tried to create “gothic elegance” and ended up with what he called “vampire disco.” But through years of experimenting (and plenty of budget-friendly mistakes), I’ve figured out how to create that perfect spooky-chic vibe without breaking the bank.
Understanding the Magic of Mood Lighting
Here’s what I’ve learned after countless Halloween seasons—the secret isn’t in buying expensive “Halloween” lights. It’s about understanding how different types of light create different feelings. And honestly? Some of my best effects come from repurposing things I already had around the house.
The breakthrough moment came three years ago when our dining room chandelier was flickering (thanks to some sketchy electrical work from the previous homeowner). I’d temporarily replaced the bulbs with some Edison-style LEDs I’d bought for a different project—those ones with the visible filament that give off warm, amber light. Combined with a few candles I’d lit for dinner, the whole room had this incredible golden glow that felt both cozy and mysterious.
My neighbor Sarah actually texted me later asking what we’d done to make our house look so inviting from the street. That’s when I realized—the best Halloween lighting doesn’t scream “HALLOWEEN!” It whispers it.
Now I start every Halloween lighting project with 2700K LED bulbs as my foundation. These are the warm white ones that create that cozy restaurant vibe, and you can grab a 6-pack at Home Depot for about $12. Way cheaper than specialty Halloween bulbs, and they work year-round.
Budget-Friendly Lighting Solutions That Look Expensive
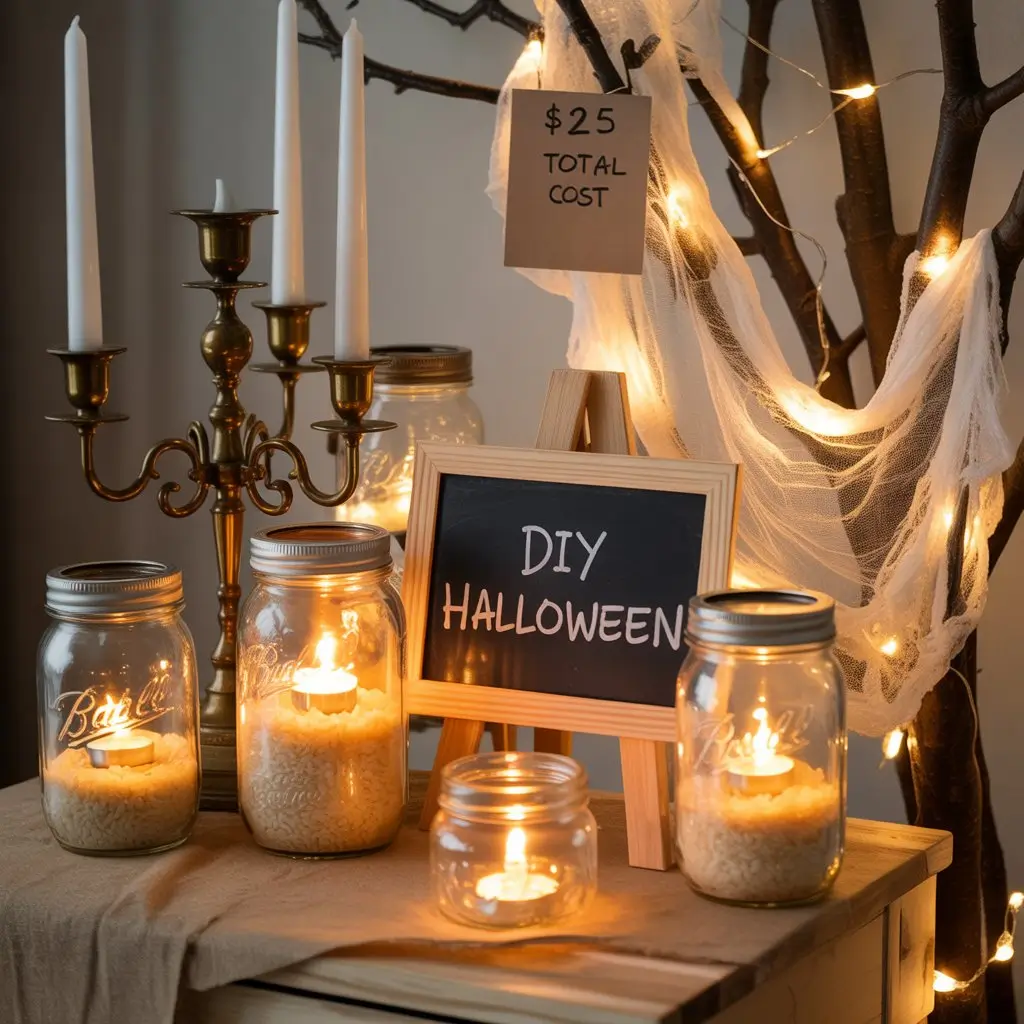
The Mason Jar Transformation I know mason jars are everywhere, but trust me on this one. I fill them about halfway with rice (the cheap stuff from the grocery store works fine), then drop in a battery-operated tea light. The rice diffuses the harsh LED glare and creates this soft, warm glow that looks incredibly sophisticated.
I make about 12-15 of these every year, and the whole project costs maybe $25. The jars themselves I pick up at garage sales for about 50 cents each, or you can get a dozen new ones at Walmart for $12. The battery tea lights come from Dollar Tree—seriously, they’re identical to the $3 ones at craft stores.
Thrift Store Gold Some of my favorite Halloween lighting pieces came from thrift stores. Old brass candlesticks (usually $2-3 each), vintage-looking lanterns, and even interesting glass bowls that I turn into luminaries. Last month I found this amazing iron candelabra at Goodwill for $4 that would’ve cost $40 new.
The trick is shopping for lighting year-round, not just in October when everyone else is looking. I’ve got a bin in my garage labeled “potential Halloween decor” that I add to whenever I spot something promising.
String Light Magic Here’s where you can really stretch your budget. Instead of buying Halloween-specific string lights, I use warm white LED strings and get creative with how I display them. A 100-foot strand costs about $15 at Costco and lasts for years.
I weave them through gauzy fabric (the kind that’s $2 a yard at Walmart), drape them behind sheer curtains, or wrap them around branches I’ve “borrowed” from our backyard maple tree. The effect is way more interesting than just hanging them in straight lines.
Creating Spooky Shadows and Projections
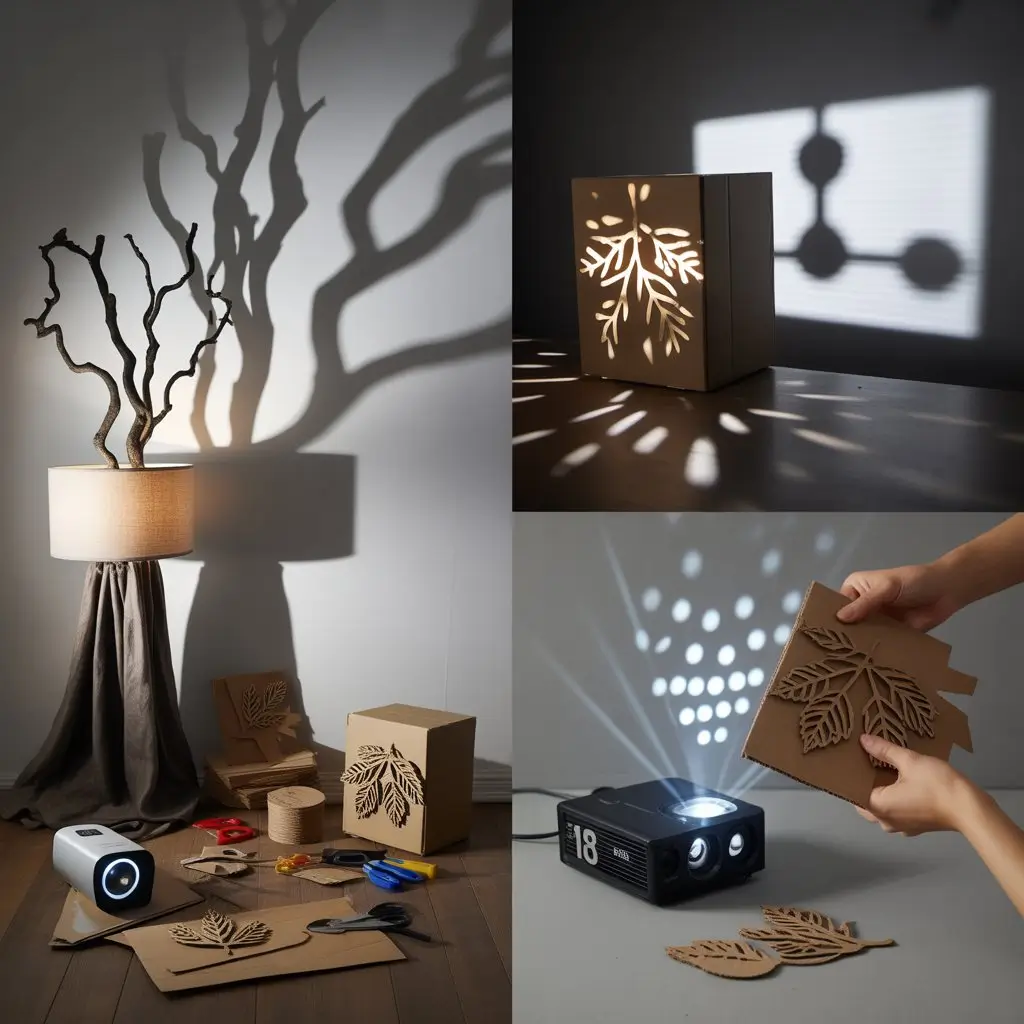
This is where the magic really happens, and it doesn’t require expensive equipment. About four years ago, I discovered the power of shadow play completely by accident when I was trying to hide an ugly lamp base with some fabric.
The Branch Shadow Trick I cut interesting branches from trees in our yard (with permission from Mark, who’s protective of his landscaping) and tape them to floor lamps that I aim at blank walls. The shadows look like something from a gothic novel, but the setup costs nothing if you already have the lamps.
If you don’t have good trees, craft stores sell realistic artificial branches for $3-5 each. I wait for their frequent 40% off sales and stock up.
DIY Light Projections Instead of buying those $50 projection lights, I create my own effects. I cut simple patterns from cardboard—nothing fancy, just organic shapes like leaves or abstract designs—and tape them over flashlights or phone flashlights. Aimed at walls or ceilings, they create these gorgeous moving patterns that look incredibly sophisticated.
For outdoor projections, I bought a basic LED projector on Amazon for $18 during Prime Day. It just projects gentle moving dots, but when I aim it through our front windows, it creates this subtle movement that makes people slow down as they walk past.
Room-by-Room Lighting Strategy
Living Room: The Heart of the Mood This is where I focus most of my energy because it’s what people see first and where we spend the most time. I replace about half the bulbs in our main fixture with those warm Edison-style LEDs, then add layers of ambient lighting at different heights.
I arrange one mason jar luminary on a pile of books, group battery candles on the coffee table (odd numbers always look better—three or five, never four), and drape some string lights behind the sheer panels on our windows. The whole transformation takes about 20 minutes and uses mostly things I already had.
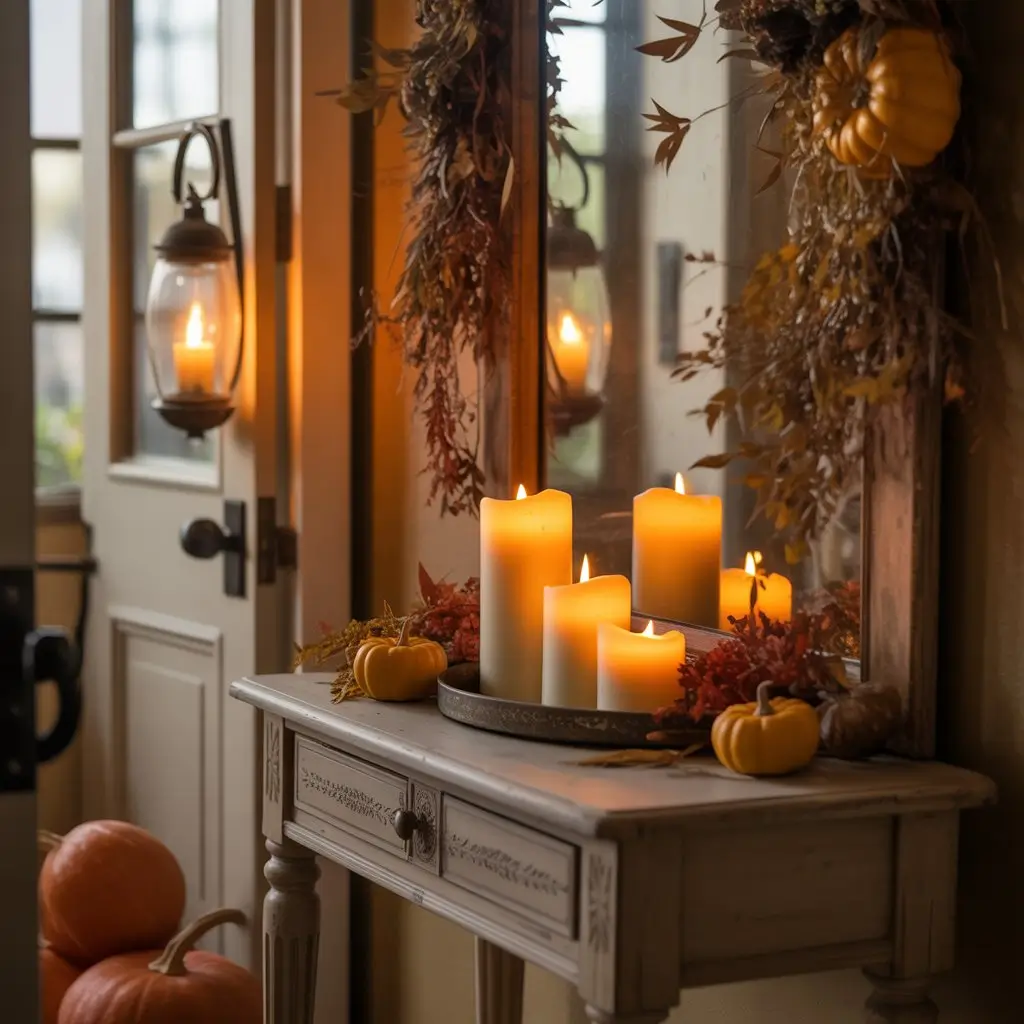
Entryway: Setting the Tone First impressions matter, so this is where I might splurge a tiny bit. I have a vintage-looking lantern (a thrift store find for $6) that I fill with a battery candle and hang by the door. On the console table, I arrange three pillar candles of different heights—real ones since we’re home when they’re lit.
The trick is keeping it welcoming. I want trick-or-treaters to feel comfortable approaching, not scared off by something too spooky.
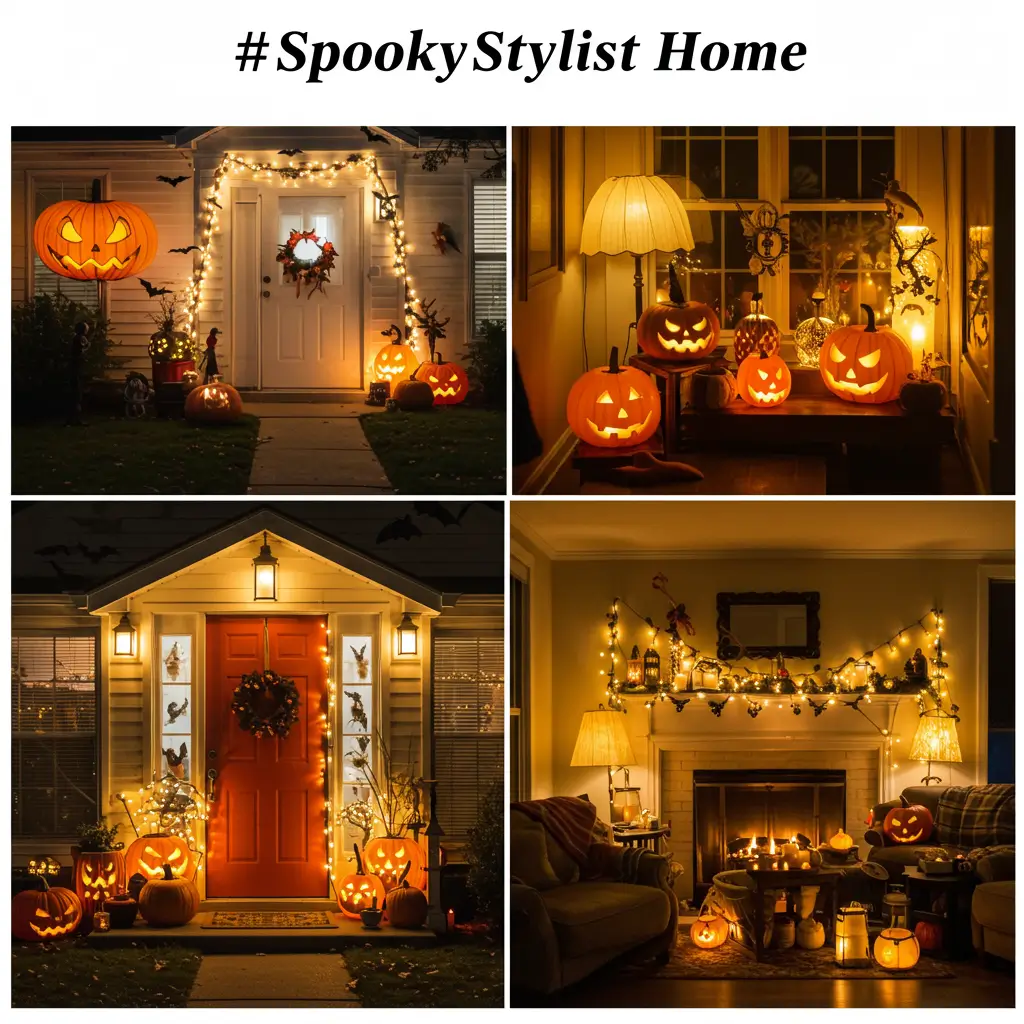
Outdoor Spaces: Extending the Magic For the porch, I wrap warm white string lights around railings and posts. In our large planters, I stick simple stakes with small paper lanterns—the kind you can get at IKEA for $5 each. I fill them with battery candles instead of real ones because October in Portland can be windy.
The mason jar luminaries line our walkway, spaced about 3 feet apart. It creates this guided path that feels magical without being overwhelming.
Advanced Techniques That Look Professional
Layered Lighting Zones Instead of lighting everything evenly, I create zones of different intensities. Some corners are dramatically shadowed, while others have pools of warm light. It’s way more interesting than uniform brightness everywhere.
Color Temperature Mixing Here’s something I learned from a lighting designer friend—mixing slightly different warm tones creates depth. I might use 2700K bulbs in one area and 3000K in another. The difference is subtle but adds sophistication.
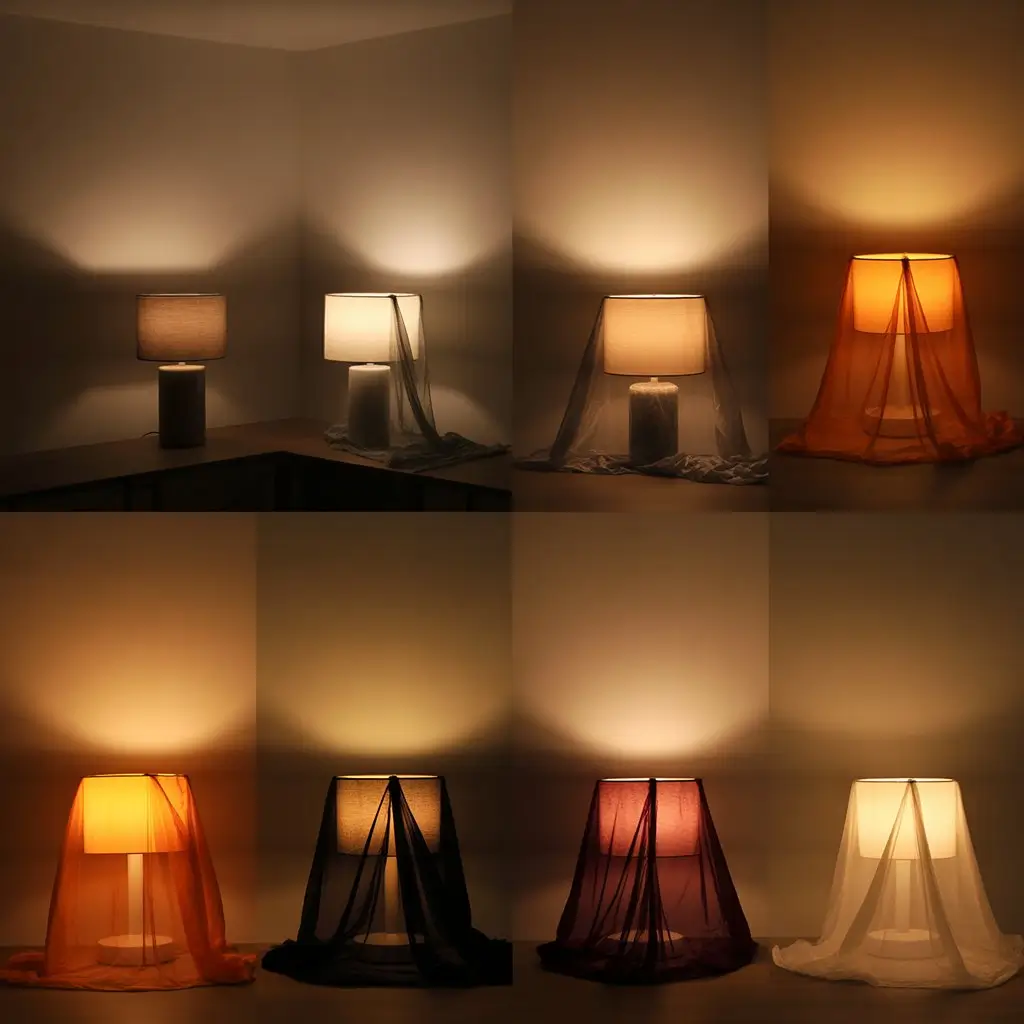
Fabric Filters This is my secret weapon for transforming harsh lights into something magical. I drape thin, gauzy fabric over lamp shades (making sure it’s not touching the bulb), and suddenly ordinary table lamps become mood lighting. Orange, deep burgundy, or even black fabric each creates a different atmosphere.
Common Budget Mistakes to Avoid
Don’t Buy Everything New. My biggest mistake early on was thinking I needed to buy specific “Halloween lighting.” Some of my best effects come from regular household items used creatively. That expensive Halloween lamp from Pottery Barn? I can create the same effect with a $5 thrift store lamp and some creativity.
Avoid the Orange Everything Trap. Orange light is not flattering on anyone, and it makes everything look artificial. I learned this the hard way my second year when I replaced every bulb in the house with orange ones. Mark said it looked like we were living inside a jack-o’-lantern.
Now I use warm white as my foundation and add just touches of amber or soft orange as accents. It’s so much more sophisticated.
Don’t Overdo the Blinking Effects. Those strobing, color-changing lights might seem fun, but they get old fast and can actually be uncomfortable for people with sensitivities. I stick to steady or very gently flickering lights for a more elegant effect.
Storing and Reusing Your Investment
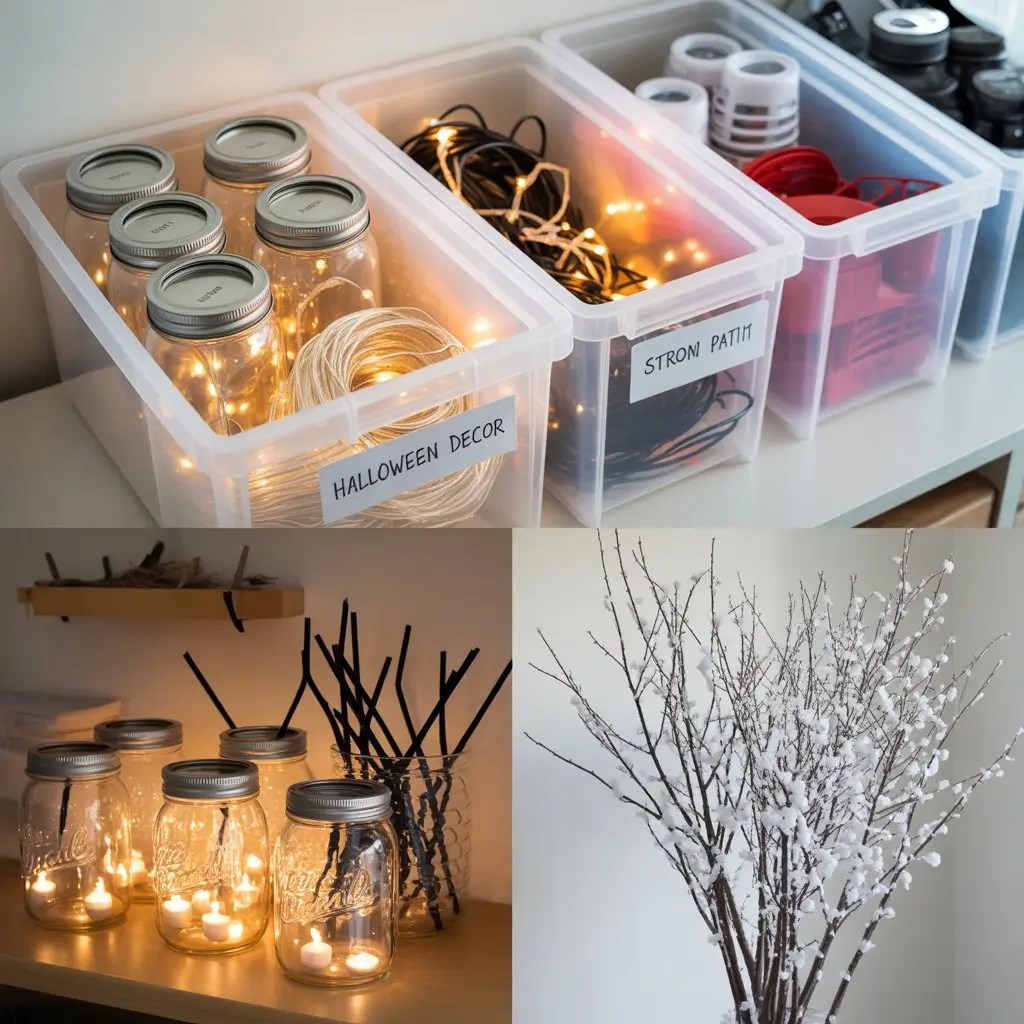
One thing that makes budget decorating work is buying pieces you can use year after year. I store all my Halloween lighting in clear plastic bins labeled with what goes where—it sounds obsessive, but it saves so much time when October rolls around.
Those mason jar luminaries? I use them for summer patio parties without the Halloween accessories. The warm string lights work for cozy winter evenings. Even the branch arrangements can become winter decor with some white spray paint and fake snow.
Safety Considerations That Save Money
Battery vs. Plug-in Strategy I use battery-operated lights for anything that’s hard to reach or might get wet. Yes, the initial cost is higher, but you save on extension cords and avoid potential electrical issues. Plus, no tripped circuits when you plug in too many things at once (learned that lesson the hard way).
Timer Controls Those $8 outlet timers from Home Depot have saved me so much money in electricity costs. Everything turns on automatically at dusk and off around 11 PM. No more forgetting to turn things off or running lights all night.
Creating Your Action Plan
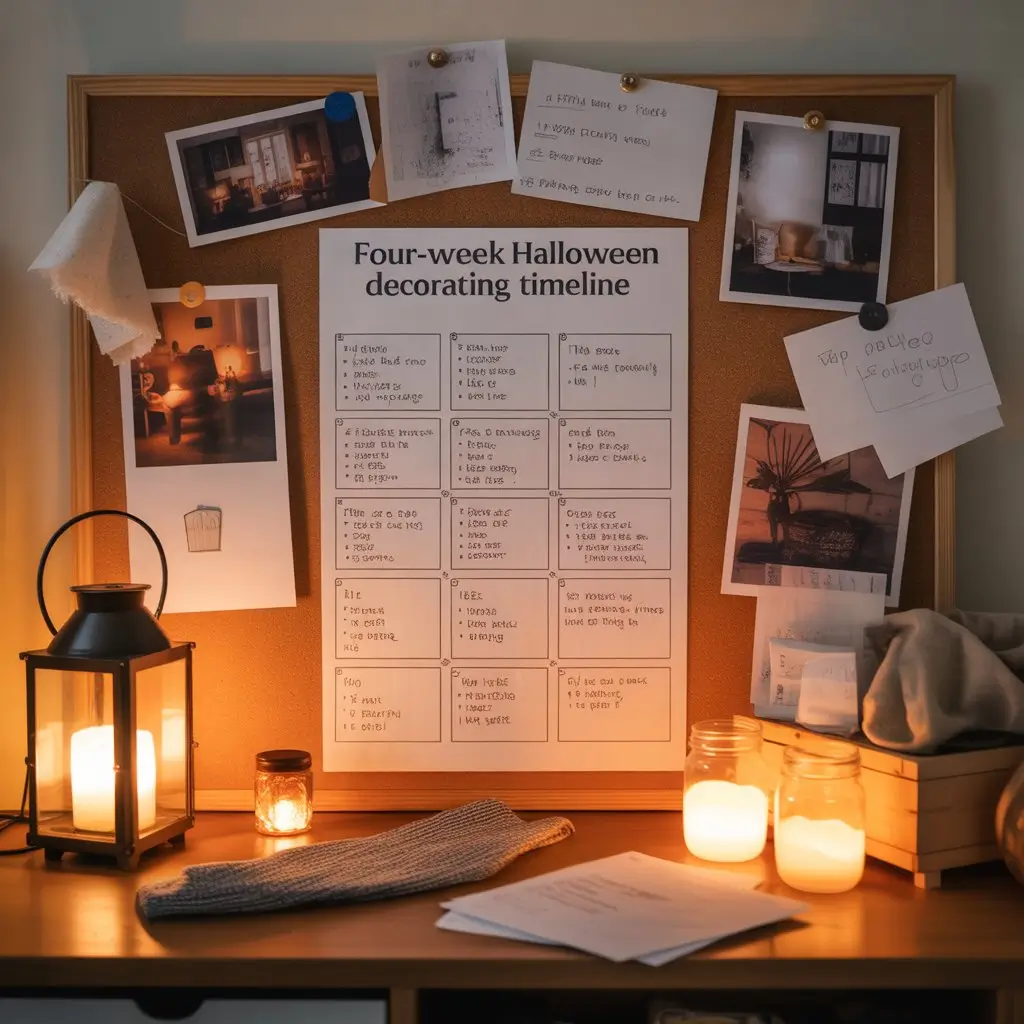
Ready to transform your home into a spooky-chic Halloween haven? Here’s your step-by-step budget game plan:
Week 1: Inventory and Thrift Walk through your house and note what lighting you already have that could be repurposed. Hit up thrift stores and garage sales for interesting vessels, candlesticks, and lanterns.
Week 2: Gather Supplies Pick up your warm LED bulbs, battery candles from Dollar Tree, mason jars, and any fabric for draping. Total budget for basics: around $40-50.
Week 3: Create and Test Set up your lighting and live with it for a few days. Adjust placement and intensity. This is when you’ll discover what works and what doesn’t.
Week 4: Perfect and Enjoy Fine-tune your setup and add any final touches. Step back and admire your sophisticated Halloween atmosphere!
Call to Action
Don’t let another Halloween pass by with boring, expensive decorations that look like everyone else’s! Start creating your own spooky-stylish lighting design this weekend. Begin with just one room and build from there—I promise you’ll be amazed at how much atmosphere you can create with simple, budget-friendly materials.
Share your Halloween lighting transformations with me on social media—I love seeing how different homes come to life with creative lighting. Tag your photos with #SpookyStylishHome and inspire others to ditch the plastic decorations for something truly magical.
Remember, the best Halloween lighting tells a story and creates an experience. Whether you’re welcoming trick-or-treaters or hosting a grown-up Halloween gathering, let your creativity shine (literally) this October!
Frequently Asked Questions
Q: How much should I budget for a complete Halloween lighting makeover?
A: You can create a stunning transformation for $50-75 if you shop smart and repurpose items you already own. I’ve helped friends do beautiful makeovers for as little as $35 by focusing on thrift finds and DIY solutions. The key is starting with warm LED bulbs as your foundation and building layers with battery candles and string lights.
Q: Are battery-operated lights worth the extra cost?
A: Absolutely! I use them for anything that’s difficult to reach or might get wet. While they cost more upfront, you save on extension cords and avoid electrical issues. Plus, they’re safer around kids and pets. I buy mine at Dollar Tree for $1 each instead of $3-4 at craft stores.
Q: How do I make my Halloween lighting look sophisticated instead of cheesy?
A: The secret is using warm white light as your base instead of going full orange everywhere. Layer different light sources at various heights, and focus on creating pools of light rather than illuminating everything evenly. Avoid blinking or color-changing effects—steady or gently flickering lights look much more elegant.
Q: What’s the best way to light my outdoor space on a budget?
A: Start with warm white string lights around porches and railings—they’re versatile and reusable. Create pathway lighting with mason jar luminaries filled with rice and battery candles. Skip expensive projectors and use simple lanterns or luminaries instead. Total cost for most front yards: $30-40.